Introduction
Recording project hours accurately is crucial for payroll processing and project tracking. This guide provides step-by-step instructions on how to enter and manage timecards in Oracle Cloud.
This Blog will walk you through the steps of recording your project hours in Oracle Cloud, providing clear and detailed instructions to ensure a smooth process.
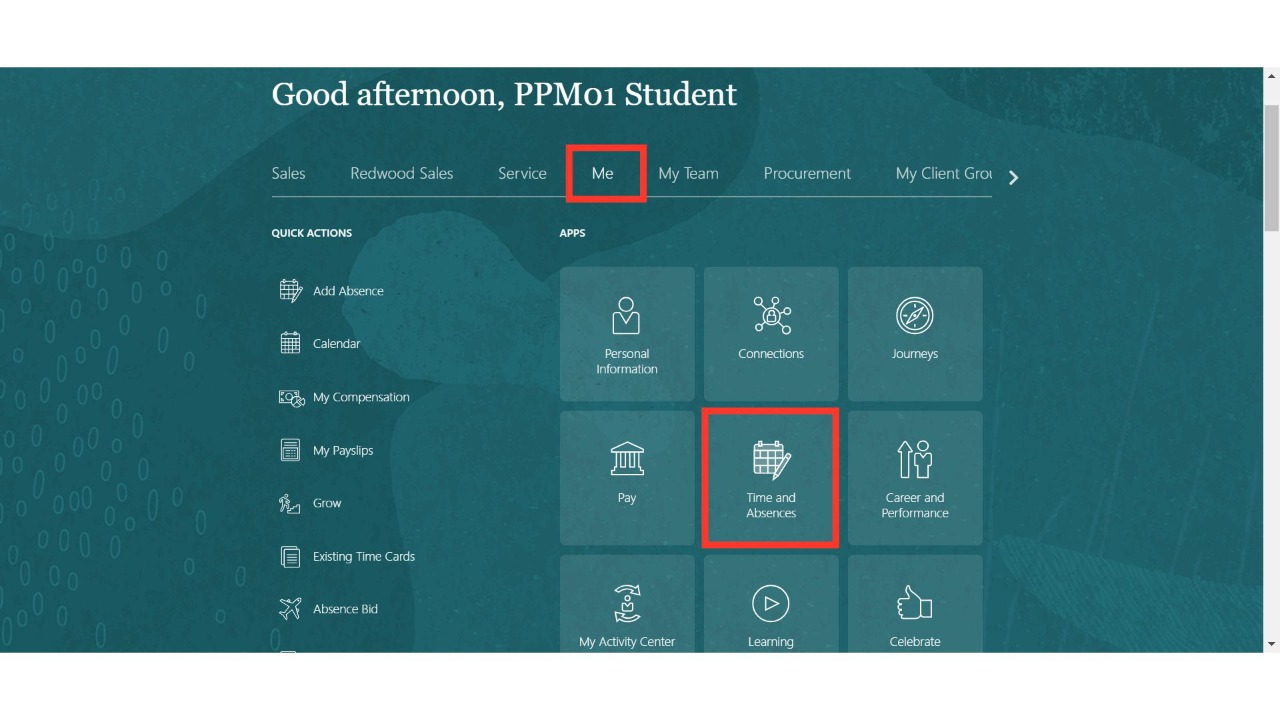
Navigate to the 'Time and Absences' sub-menu under the 'Me' menu on the Oracle Home page.
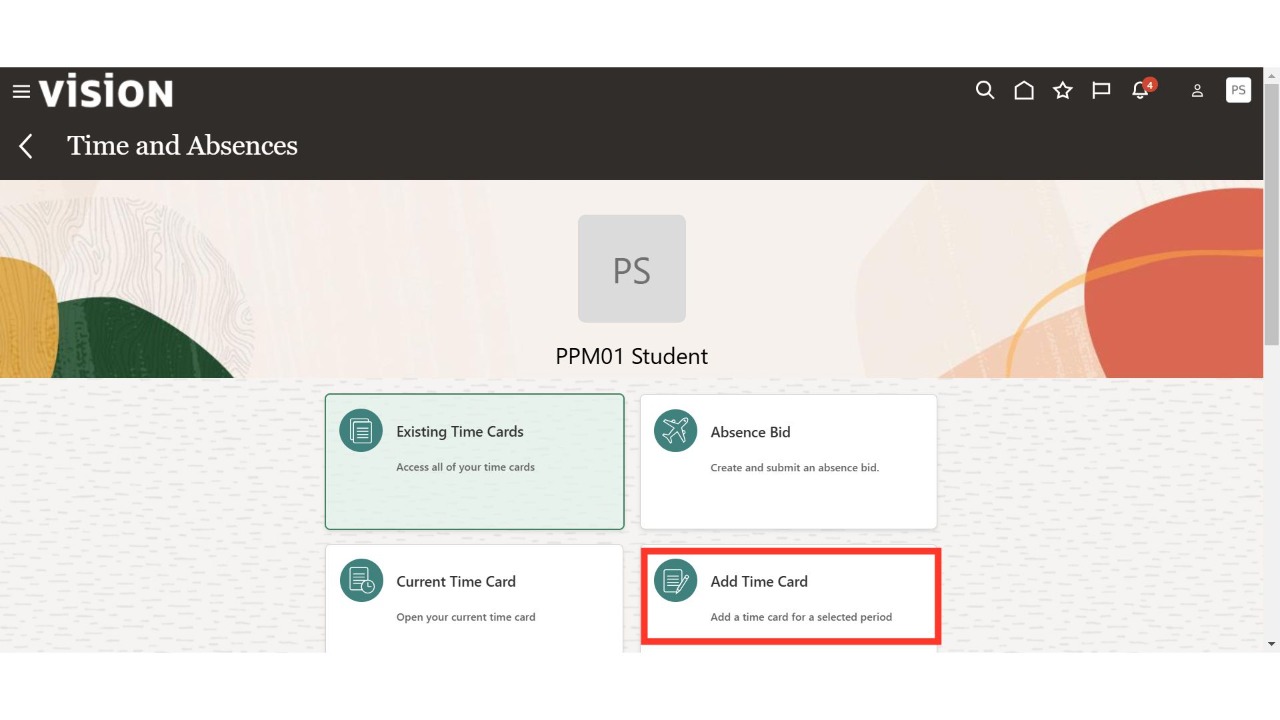
Click on the 'Add Time Card' section.
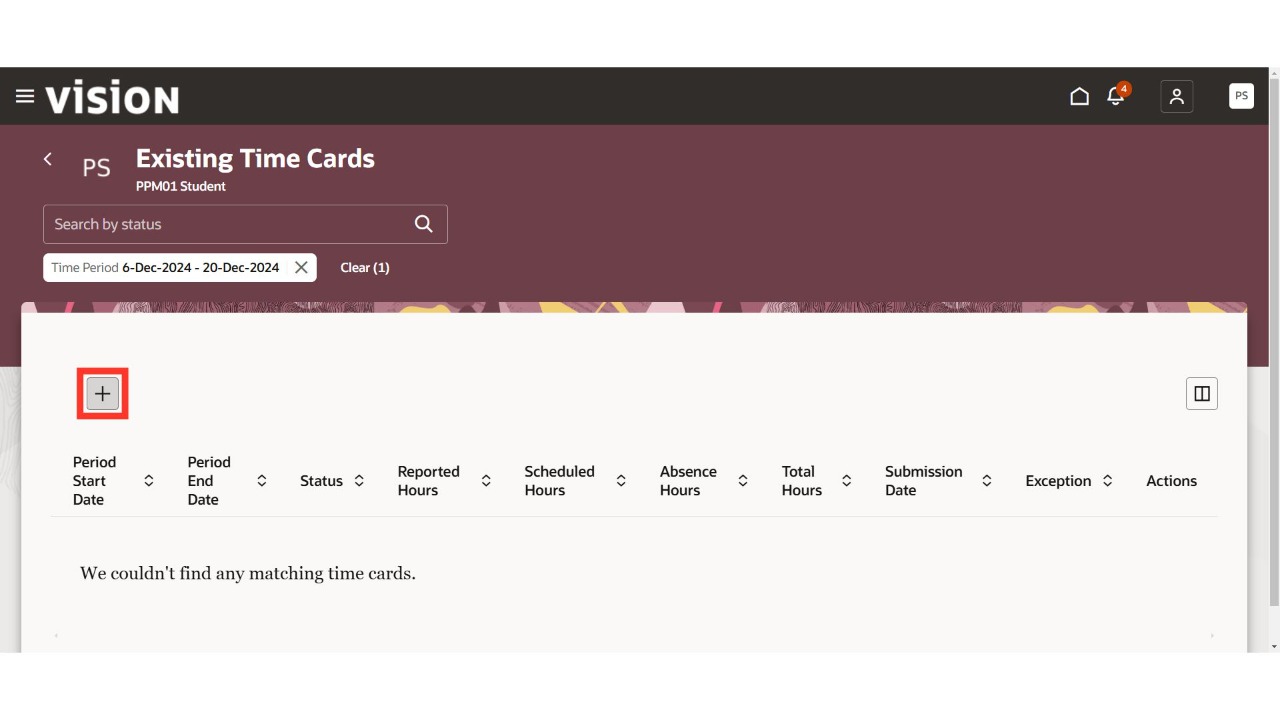
Click on the plus button to enter time for the projects and tasks.
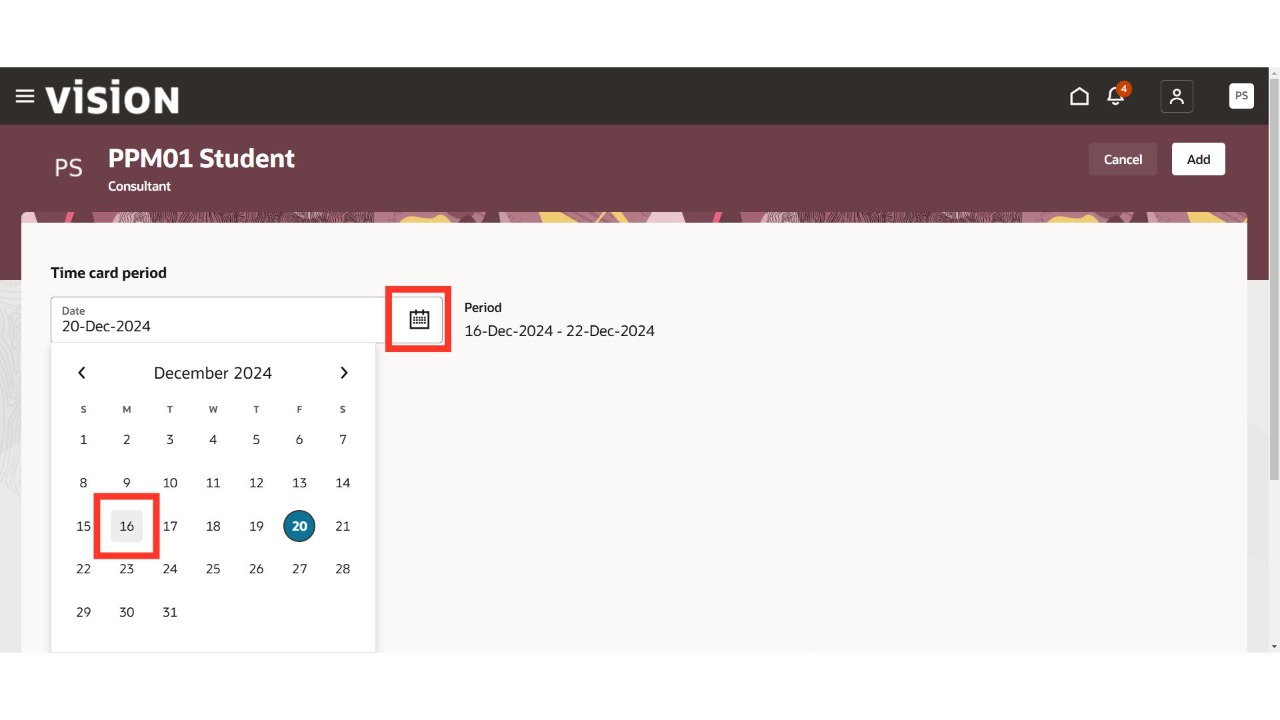
Click on the calendar icon, select the required weekday for which you want to enter time, and then click 'OK'.
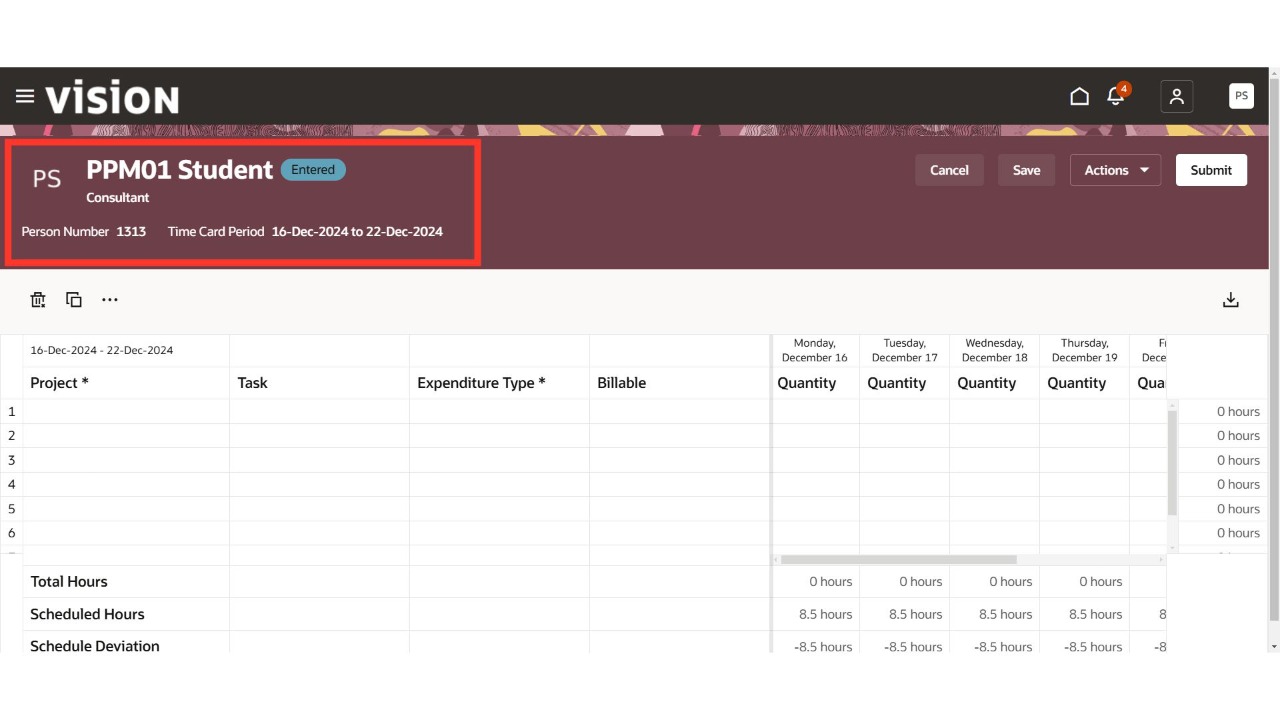
On the timecard header, you will see personal information such as Name, Number, Position, and Job, along with timecard details like the period.
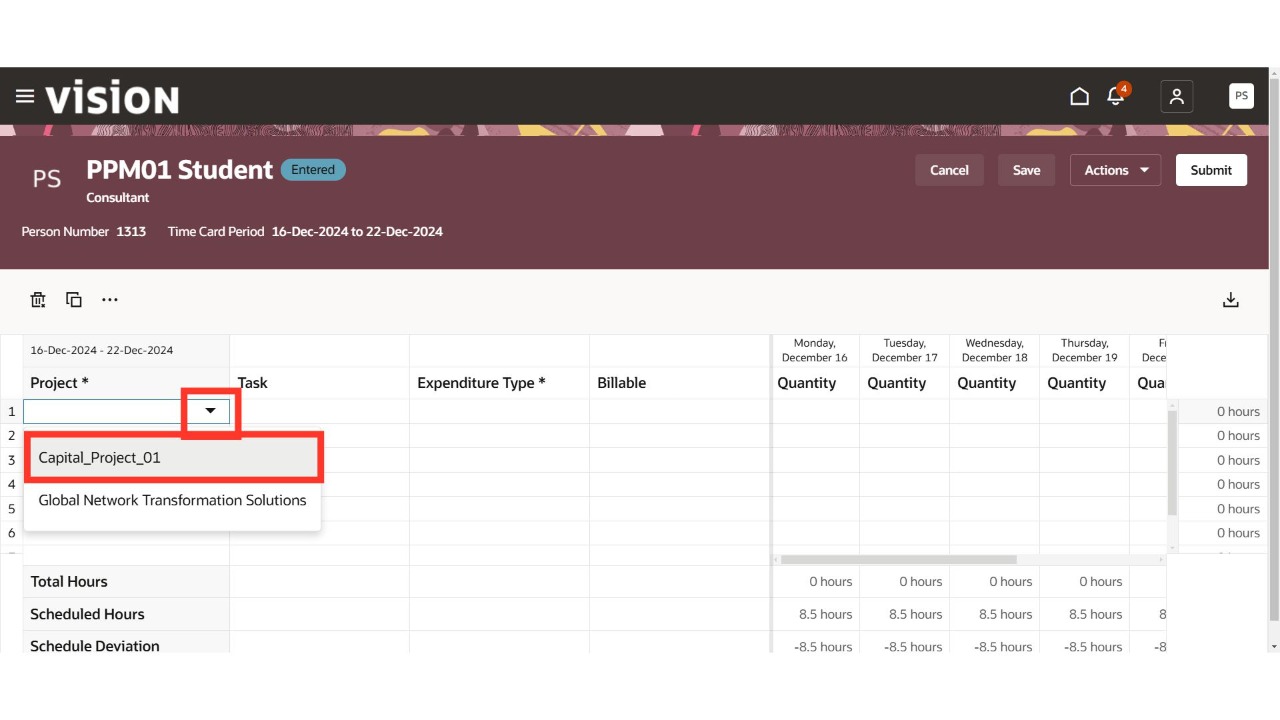
Scroll down, click the drop-down menu to search for and select the project. Ensure that the project is in active status.
 Once the project is selected, click the drop-down menu in the Task field to search for and select the required task. Ensure that the task is marked as chargeable in the 'Financial Project Plan'.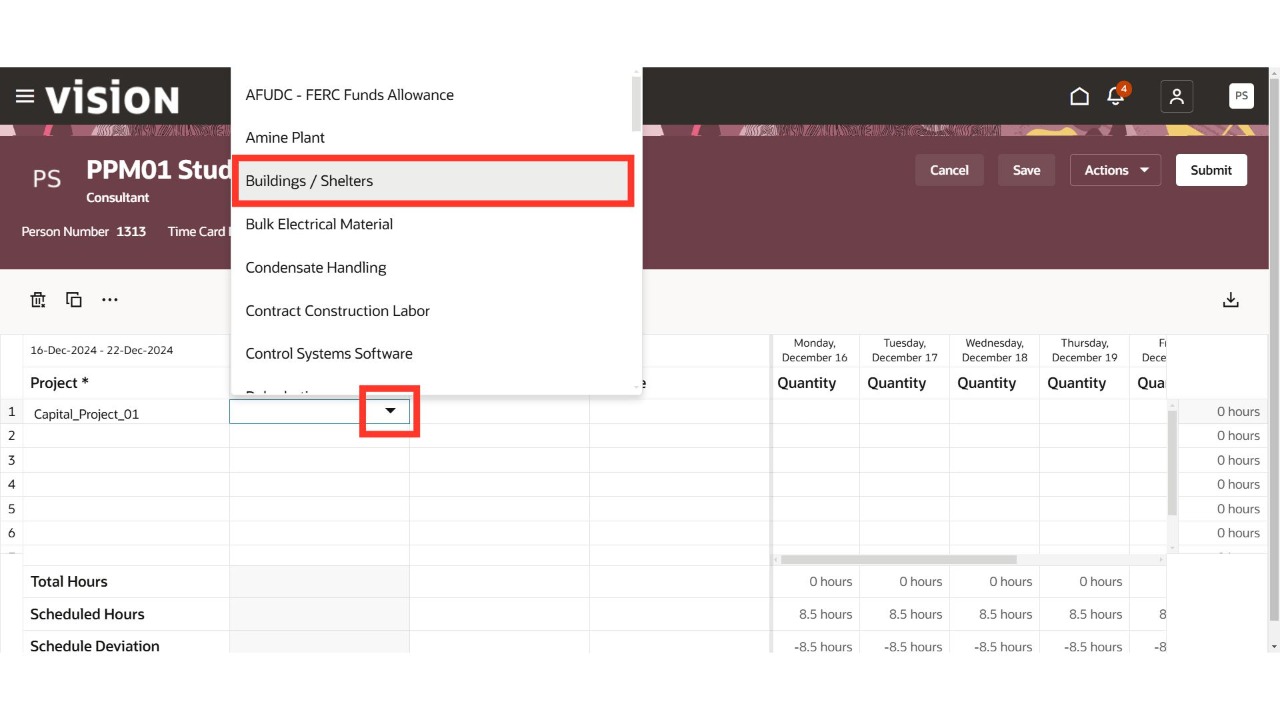
Similarly, click on the 'Expenditure Type' drop-downs and select the relevant details.
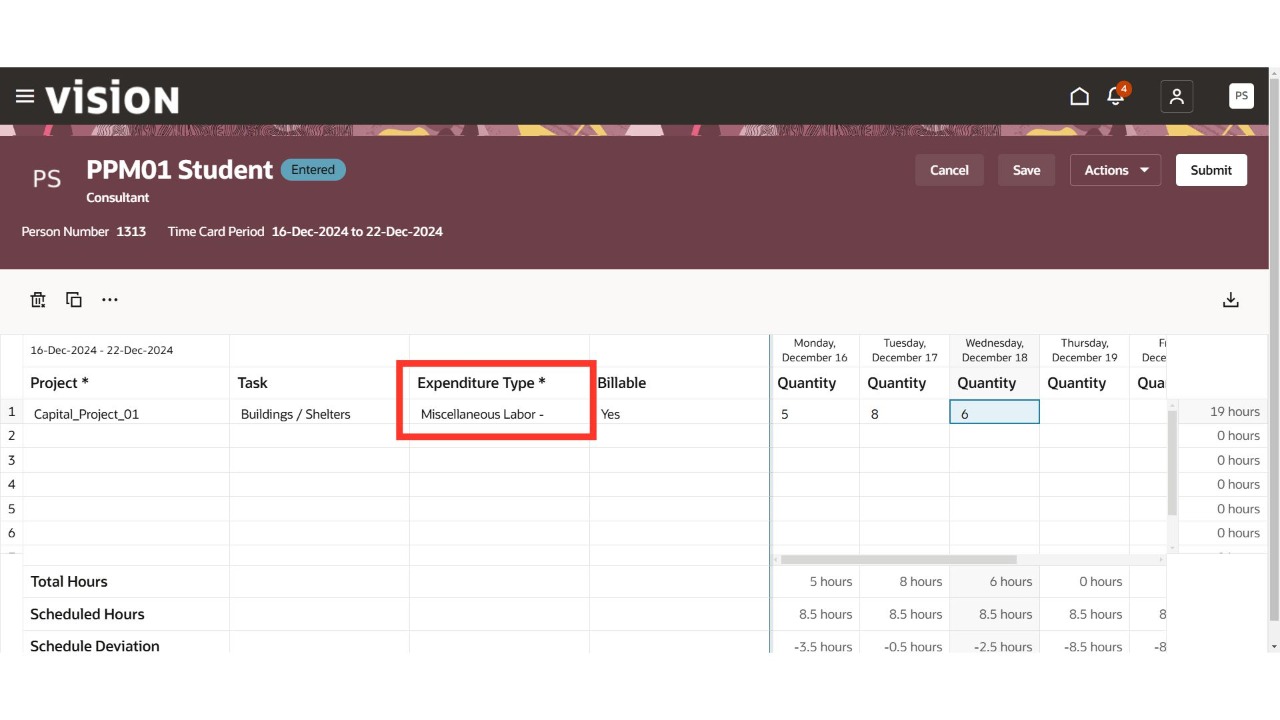
Enter the number of hours worked for the projects and tasks on the corresponding days and dates. If needed, you can add multiple projects and tasks within the same timecard period.
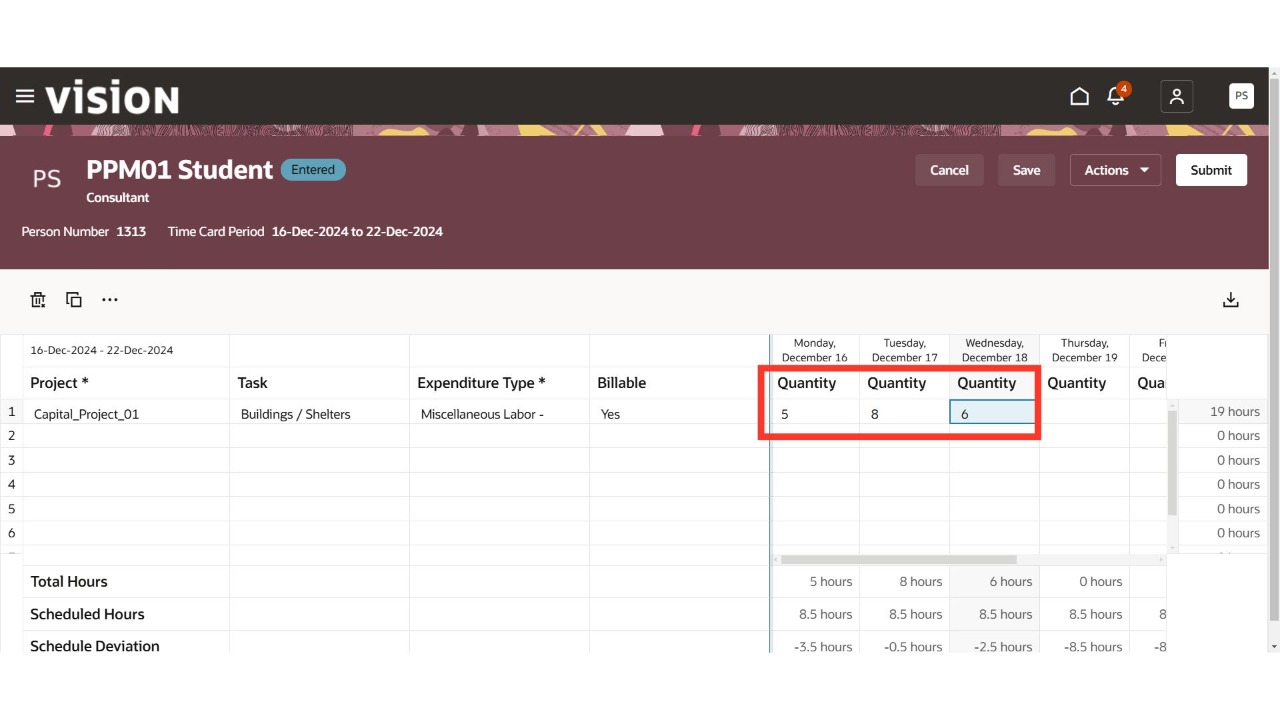
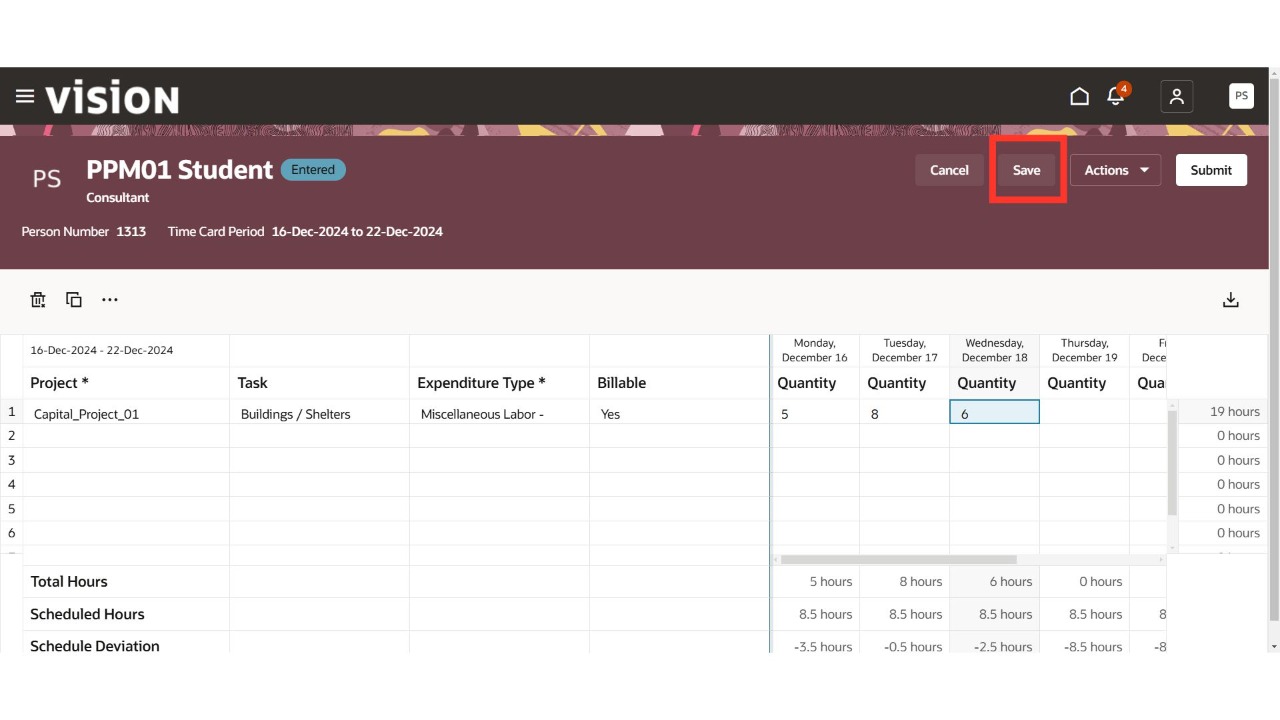
After entering the necessary information, click on 'Save'.
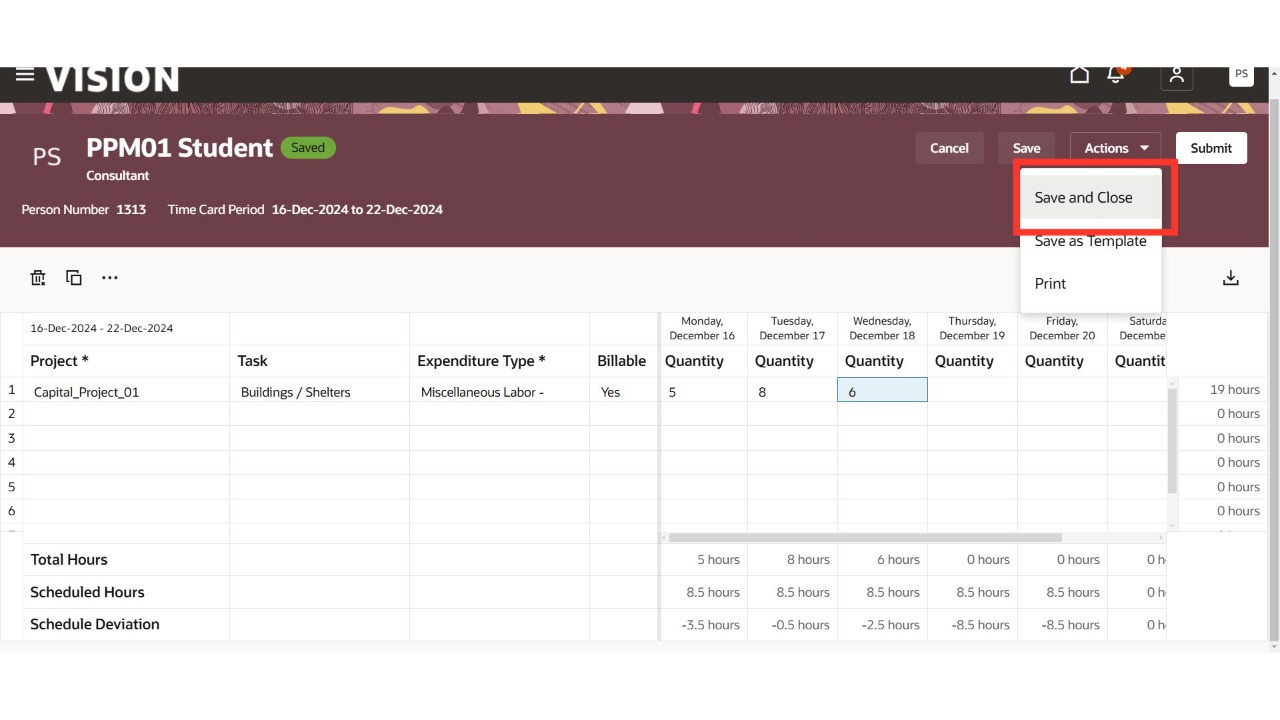
Click on 'Save and Close' to save your changes and exit this screen.
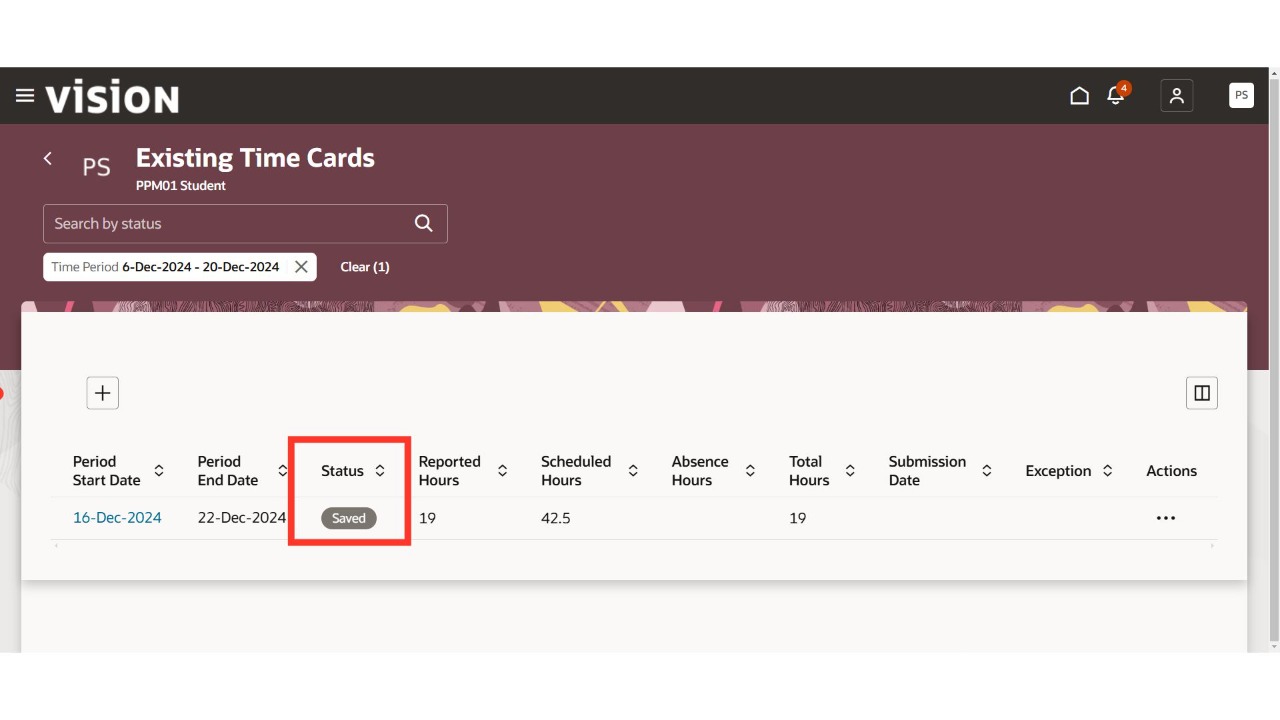
The timecard status will update to 'Saved.' Click on 'Home' to finish the process.
Thank You.