Introduction
Closing a project in Oracle Cloud involves reviewing financial settings, commitments, and exceptions before finalizing the status change. This guide provides step-by-step instructions to ensure a seamless project closure process.
This blog provides detailed instructions on project closure process within the Oracle Cloud.
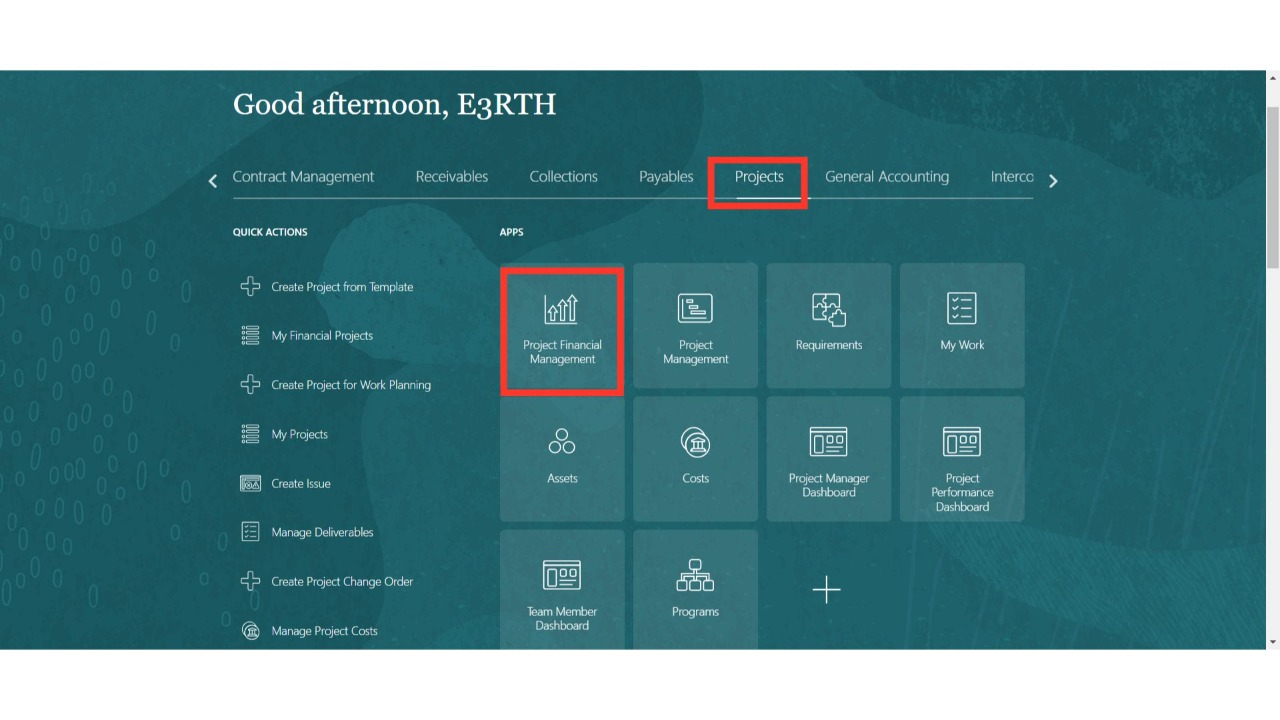
Navigate to the 'Project Financial Management' sub-menu under the 'Projects' menu from the Oracle home page.
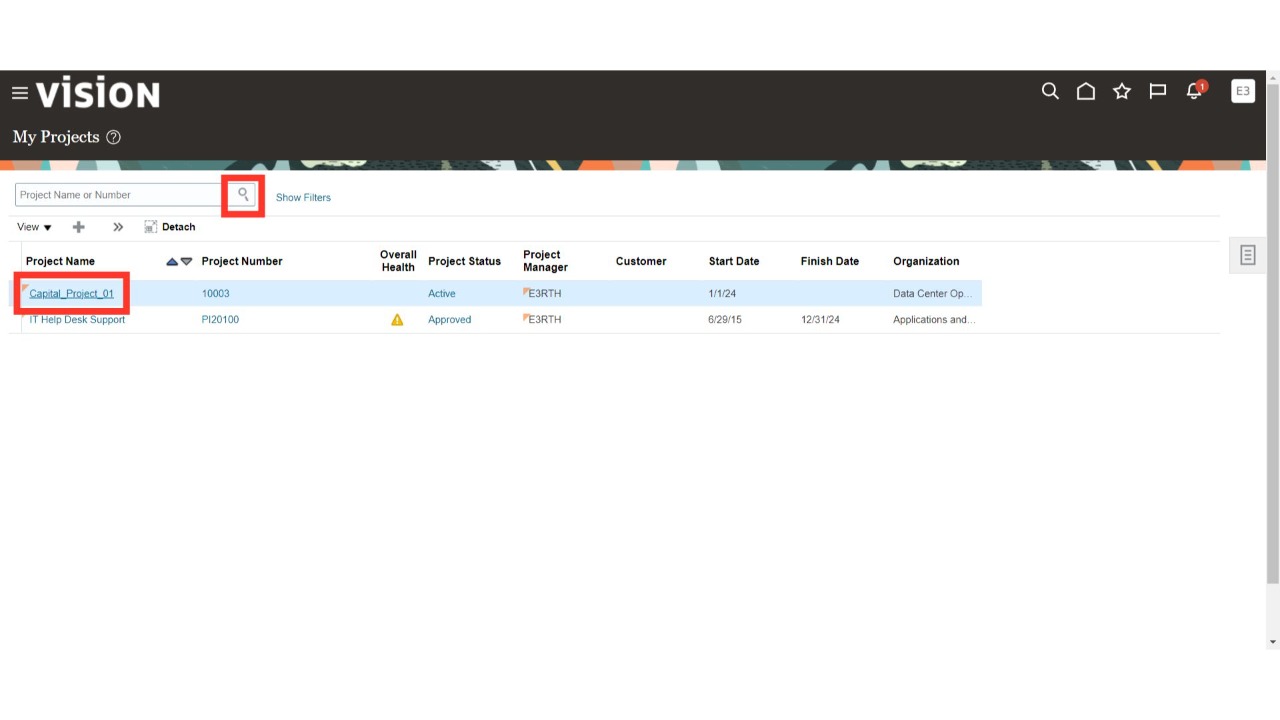
On the ‘My Projects’ page, search for a project by entering the project name or number into the search field.
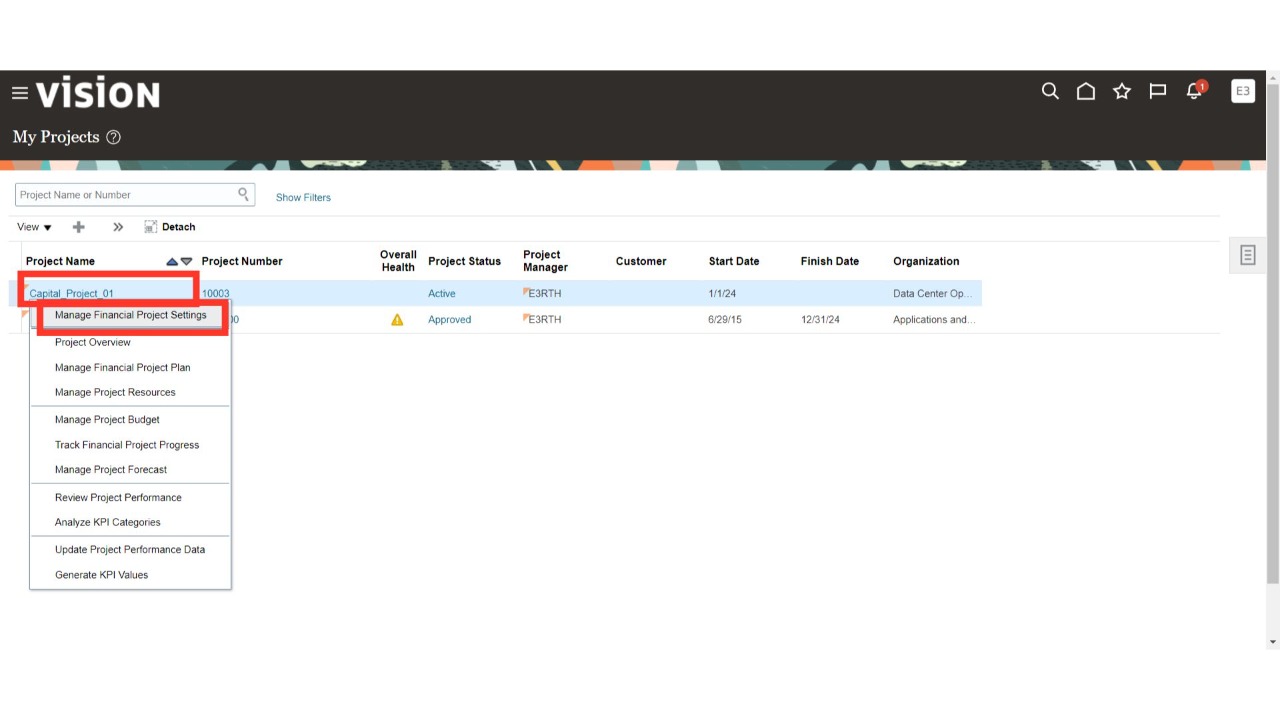
Select the relevant project row and click on the hyperlink of the project name. Choose 'Manage Financial Project Settings' from the available options.
Click on the 'General' tab on the 'Manage Financial Project Settings' page.
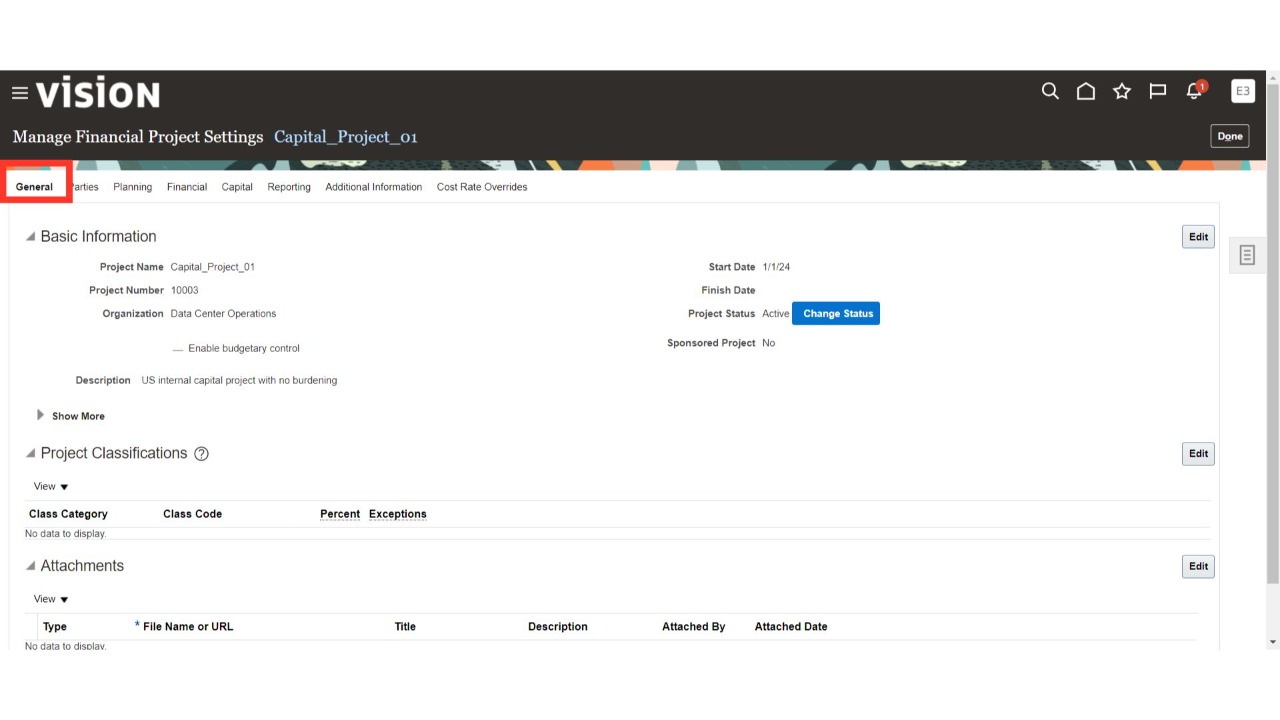
Review the current project status. Before proceeding to close the project, ensure to review key aspects such as project commitments, exceptions, and accounting.
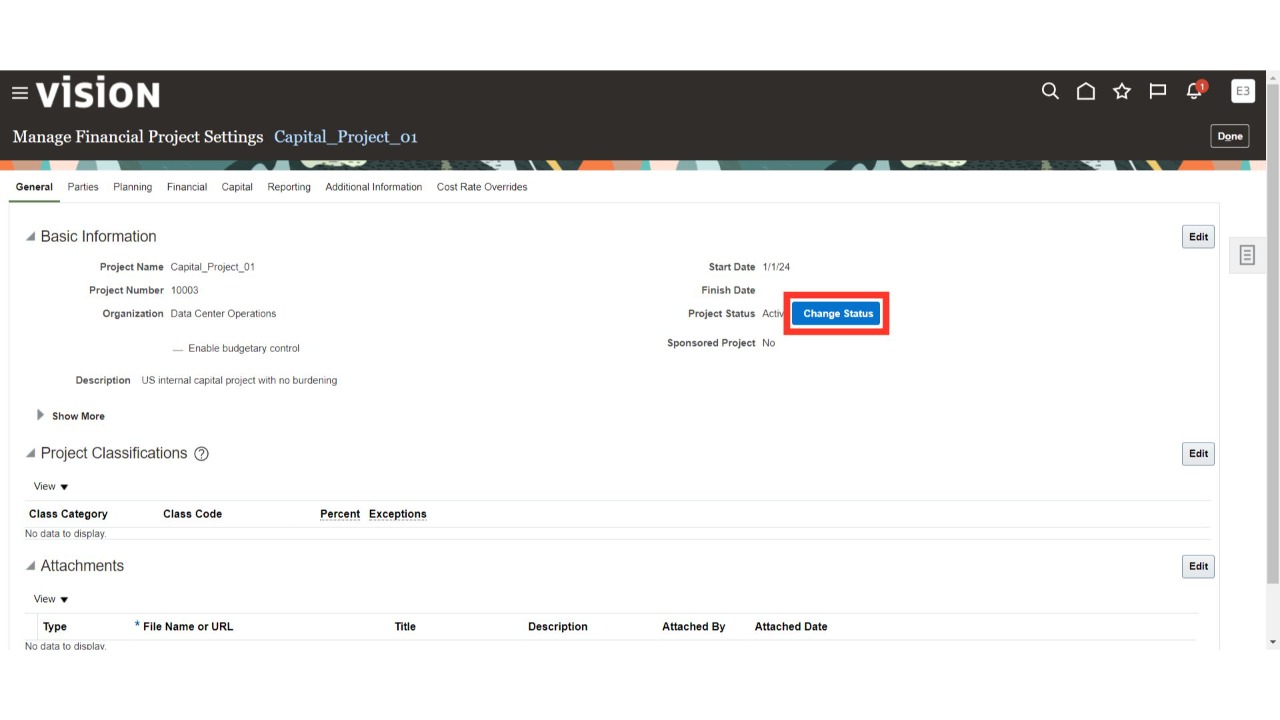
Observe the 'From' and 'To' project status fields. The 'From' status indicates the current project status, while the 'To' status displays the next allowable status based on the project status configuration.
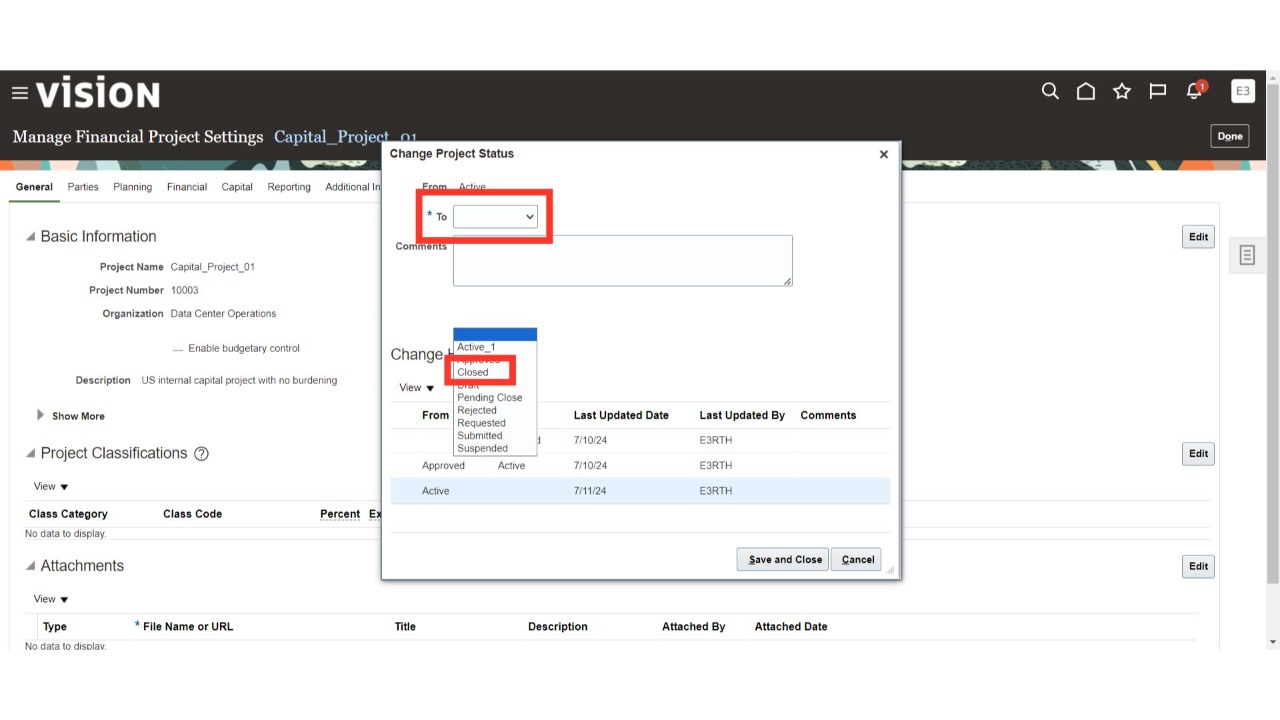
Select the applicable project status in the 'To' project field. If needed, add comments in the 'Comments' section.
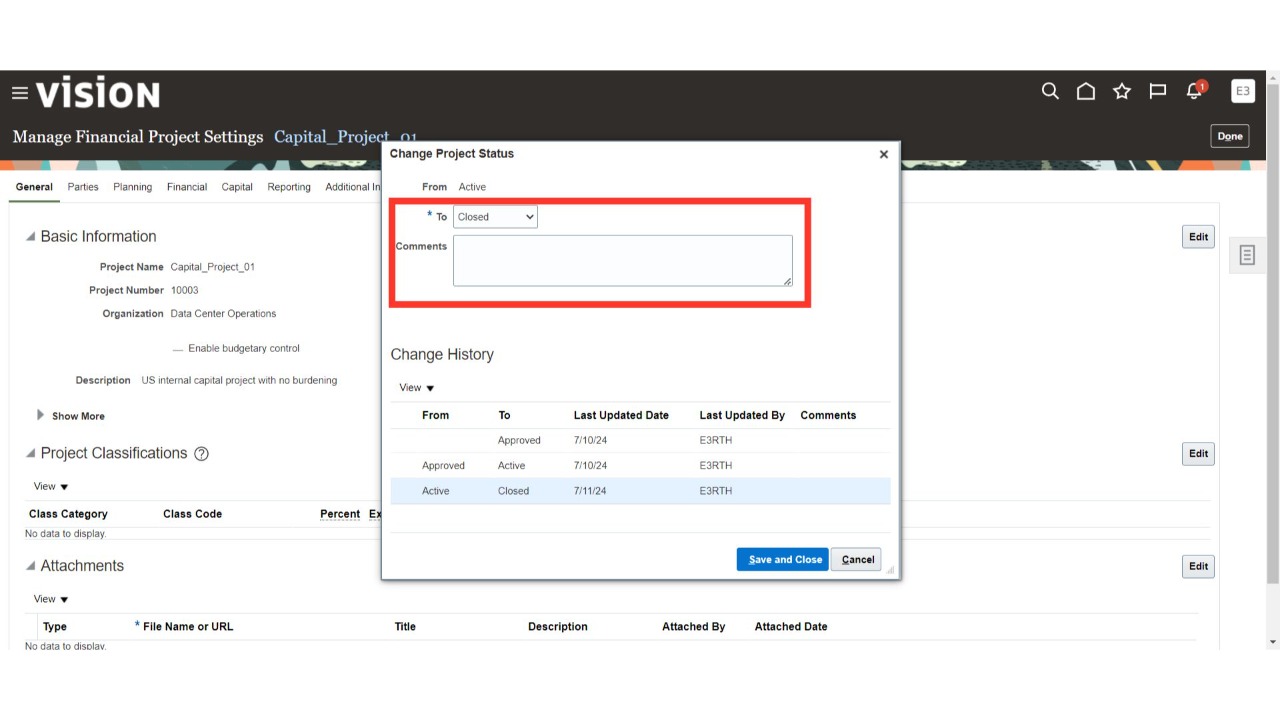
Review the change history of the project status. Click on 'Save and Close' to submit the project.
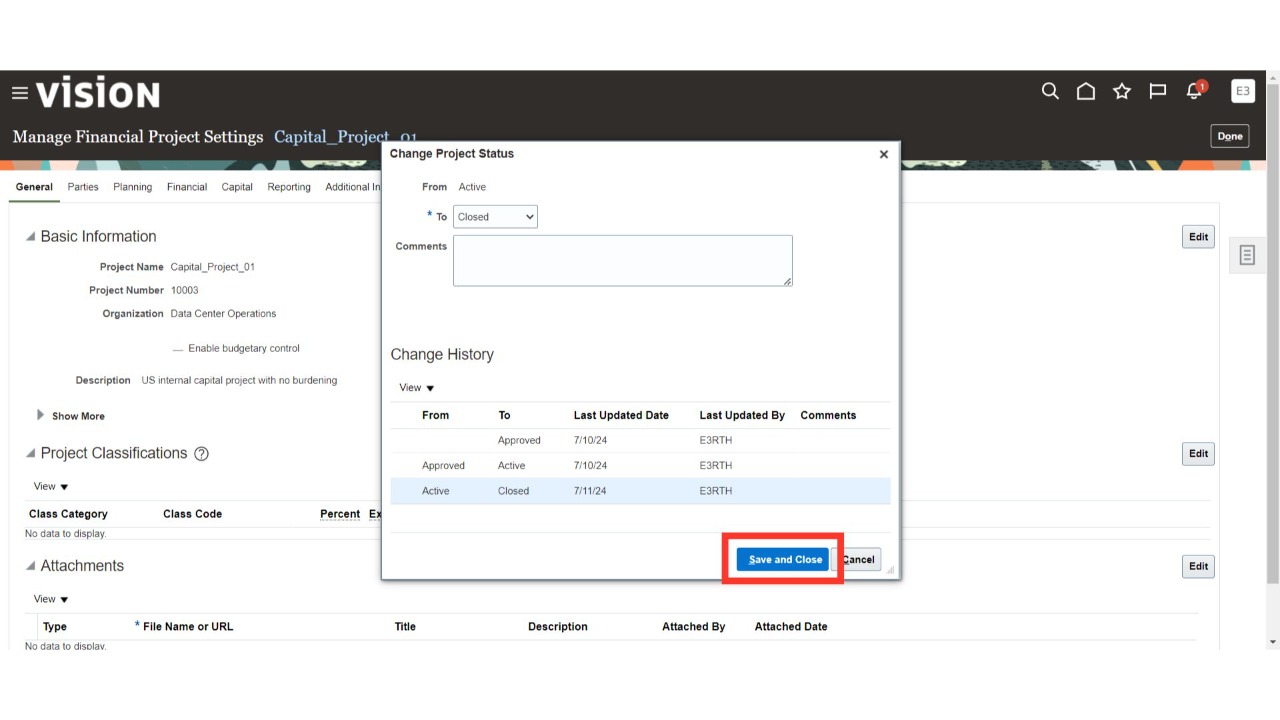
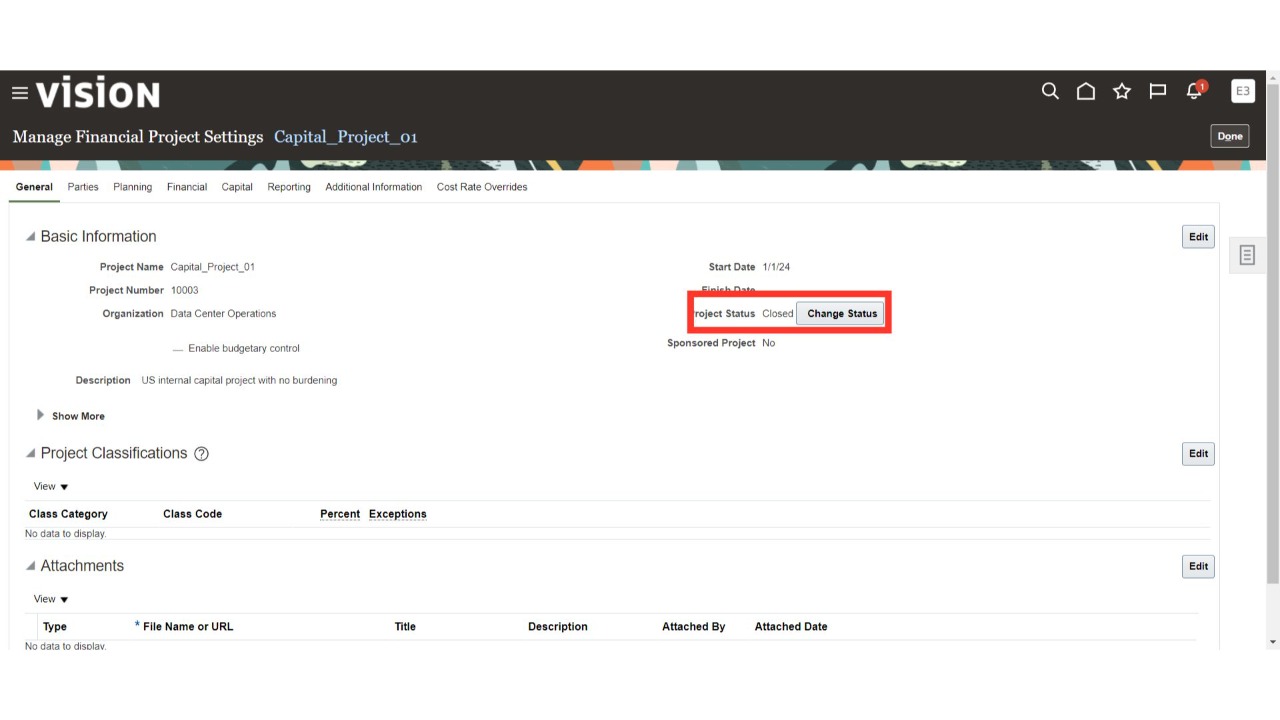
Confirm that the project status has changed from 'Active' to 'Closed'.
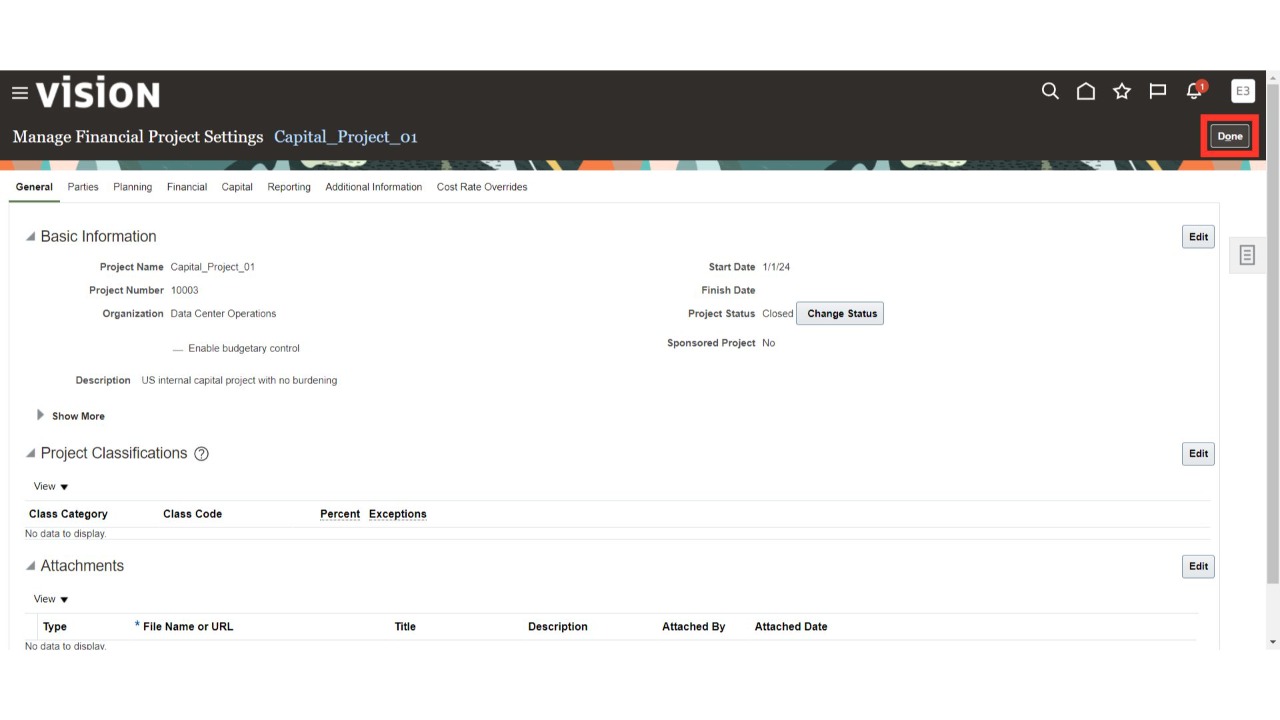
Complete the process by clicking on 'Done'.
Thank You.