Introduction
Creating a capital project in Oracle Cloud using a predefined project template simplifies the setup process and ensures consistency. This guide provides a step-by-step approach to help project managers create a capital project efficiently within the Oracle ERP system.
Follow the precise instructions below to efficiently set up the capital project from the capital project template.
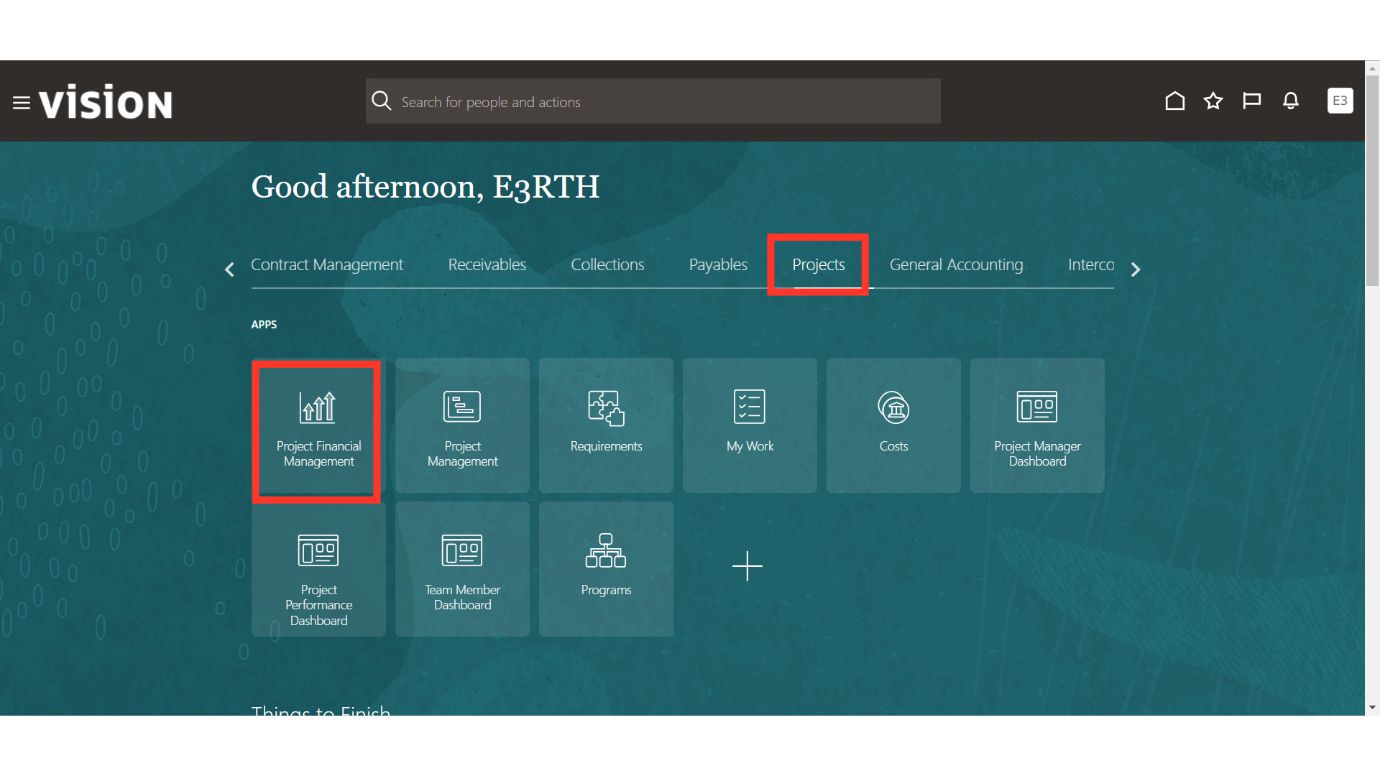
Click the Projects menu and then select the Project Financial Management sub-menu.
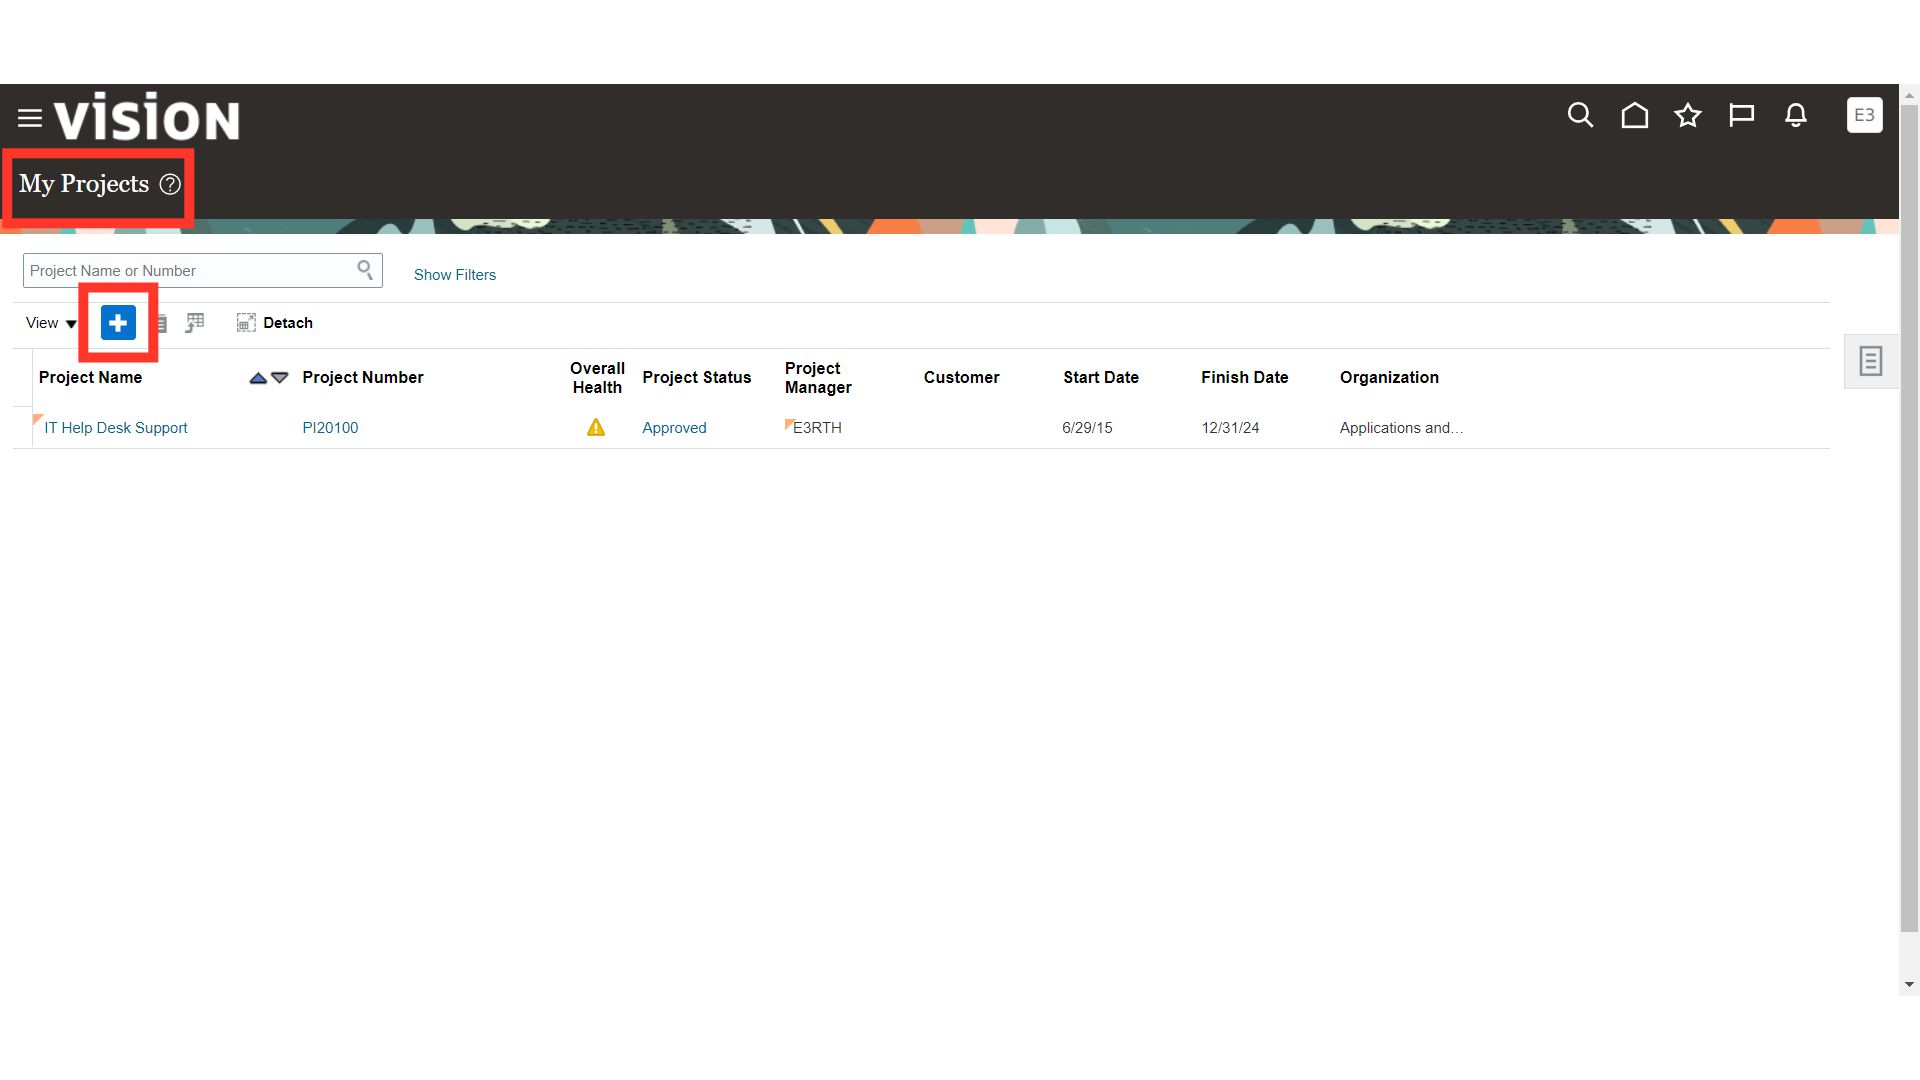
On the 'My Projects' screen, click the Plus icon to create a project using the project template.
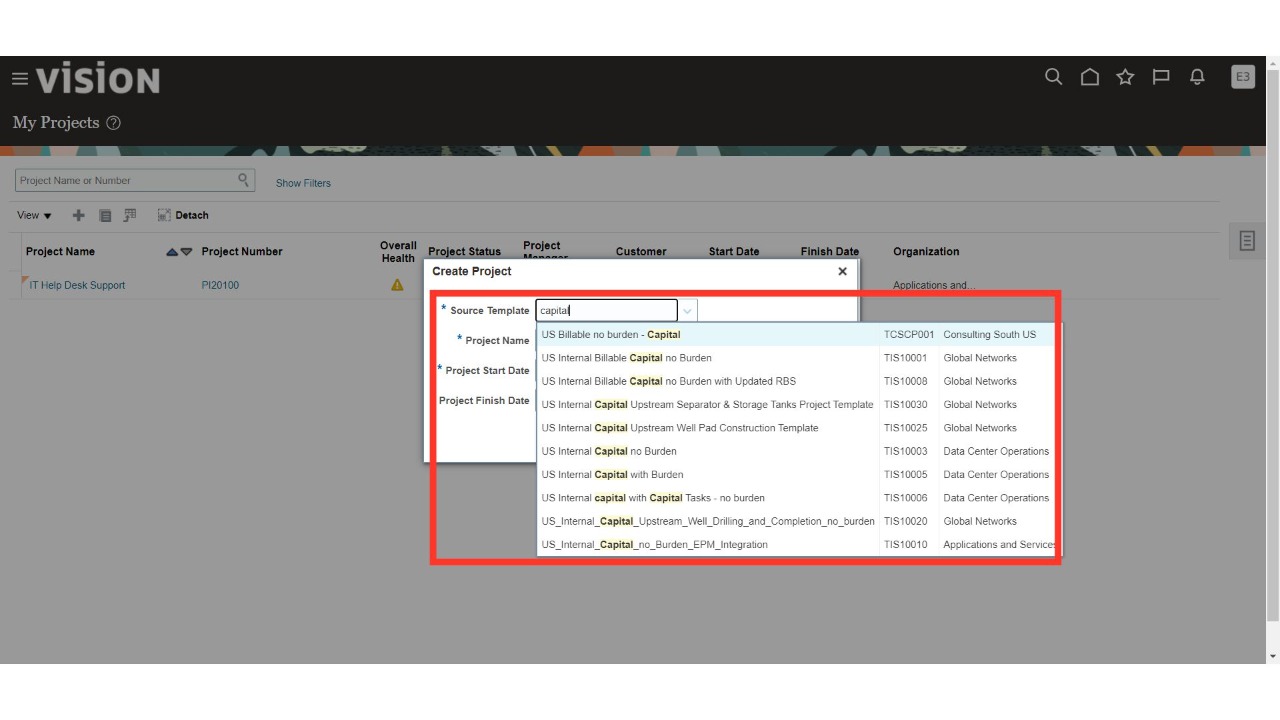
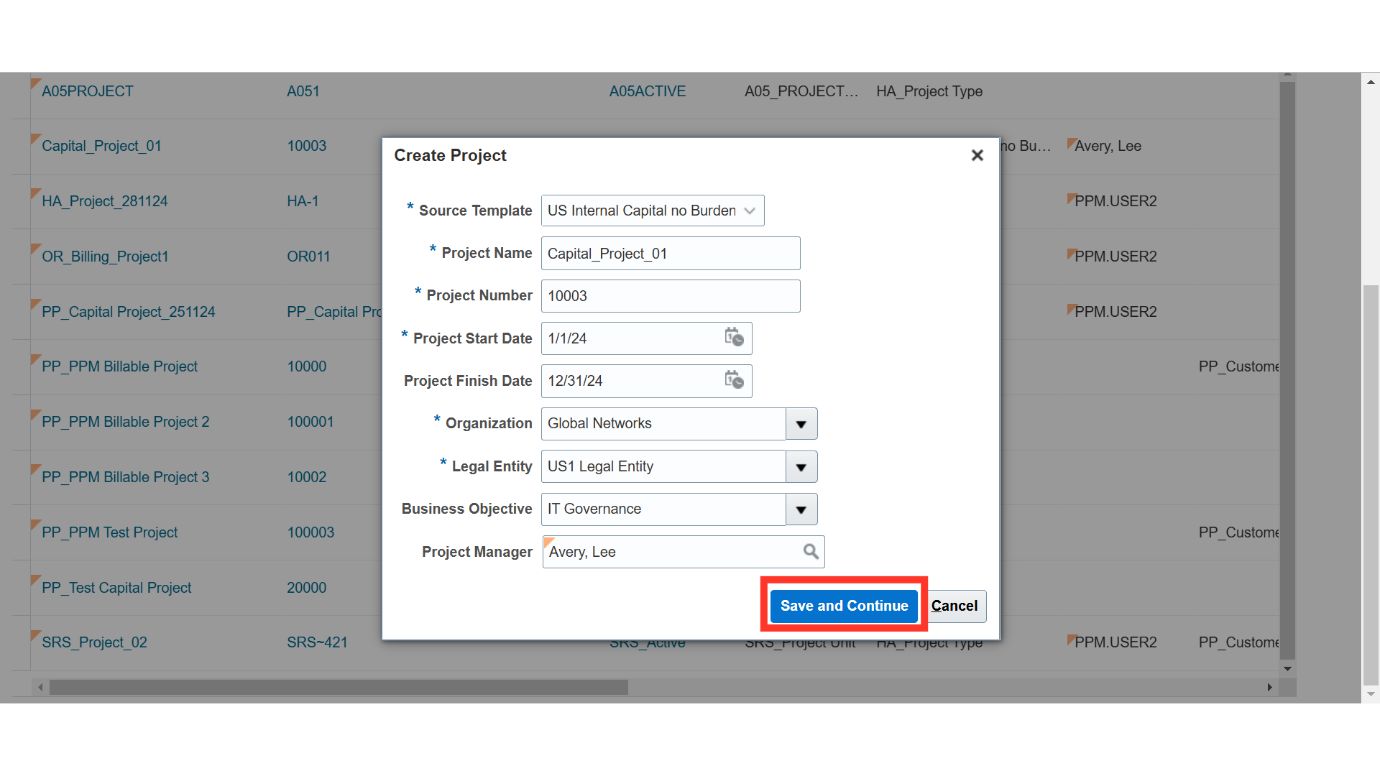
Click the drop-down in the Source Template field, and search for the relevant capital project template. Please note that only templates you have access to will be displayed.
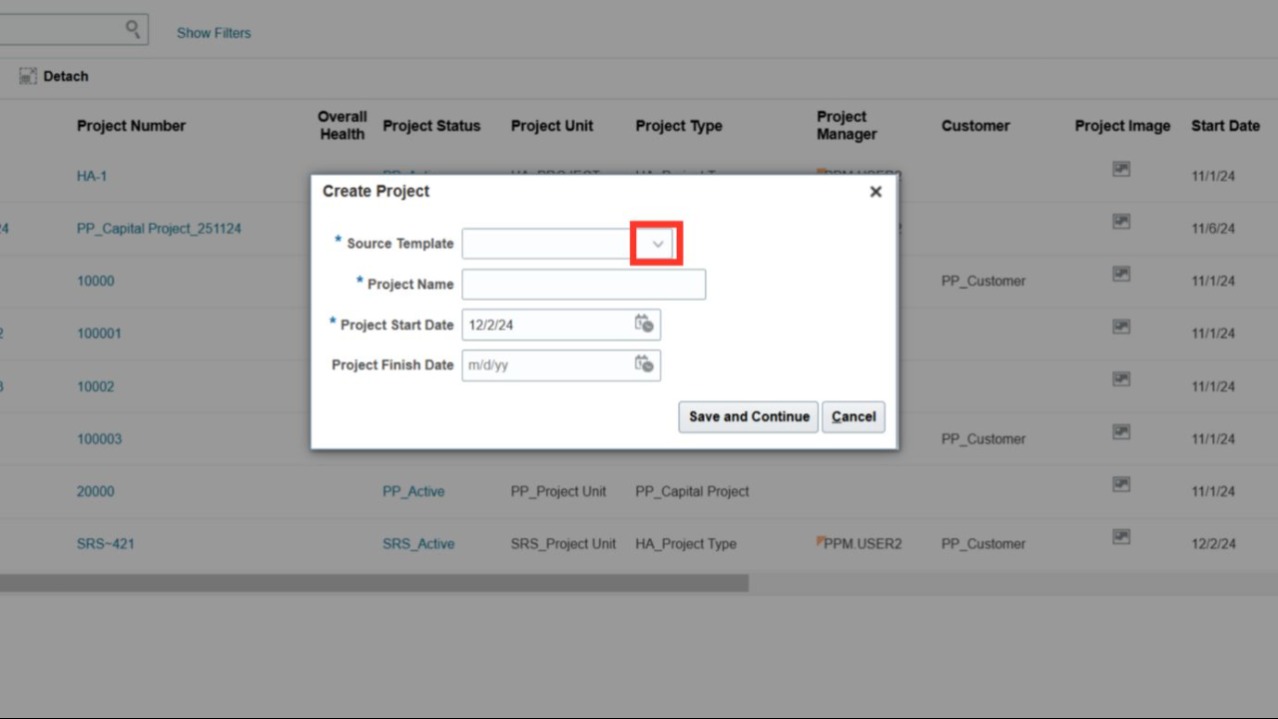
Select the required capital project template from the list, and additional fields will automatically populate in the Create Project window based on your project template selection.
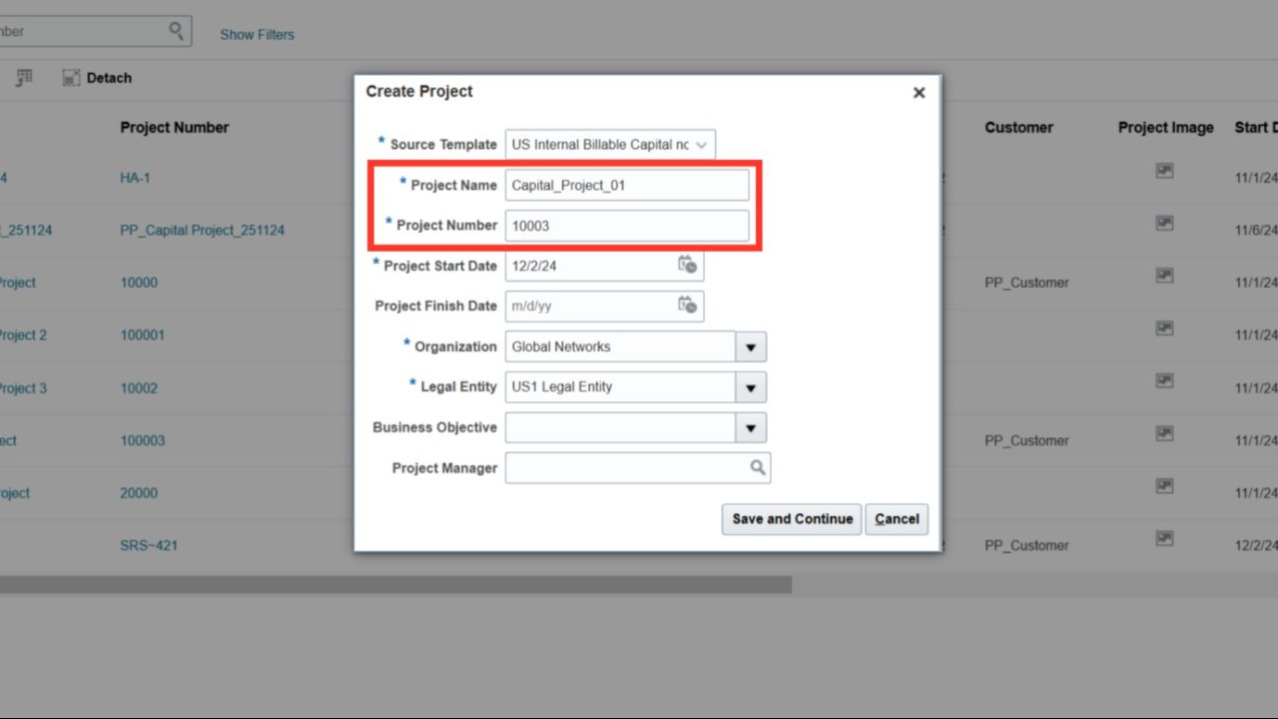
Enter the capital project name and number, ensuring both are unique.
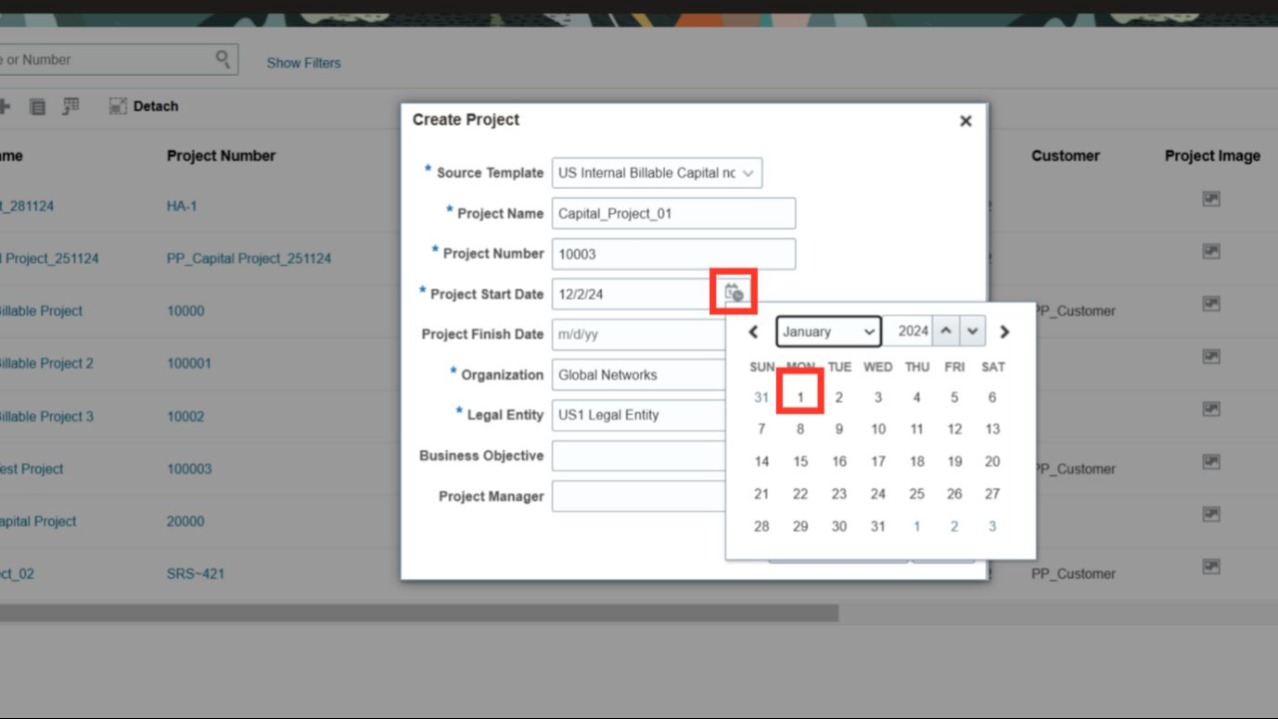
By default, Oracle Cloud sets the current system date as the project start date, but you can click the Calendar icon to change it if needed.
Click the Calendar icon to select the project end date, noting that this date is tentative and can be updated later if needed.
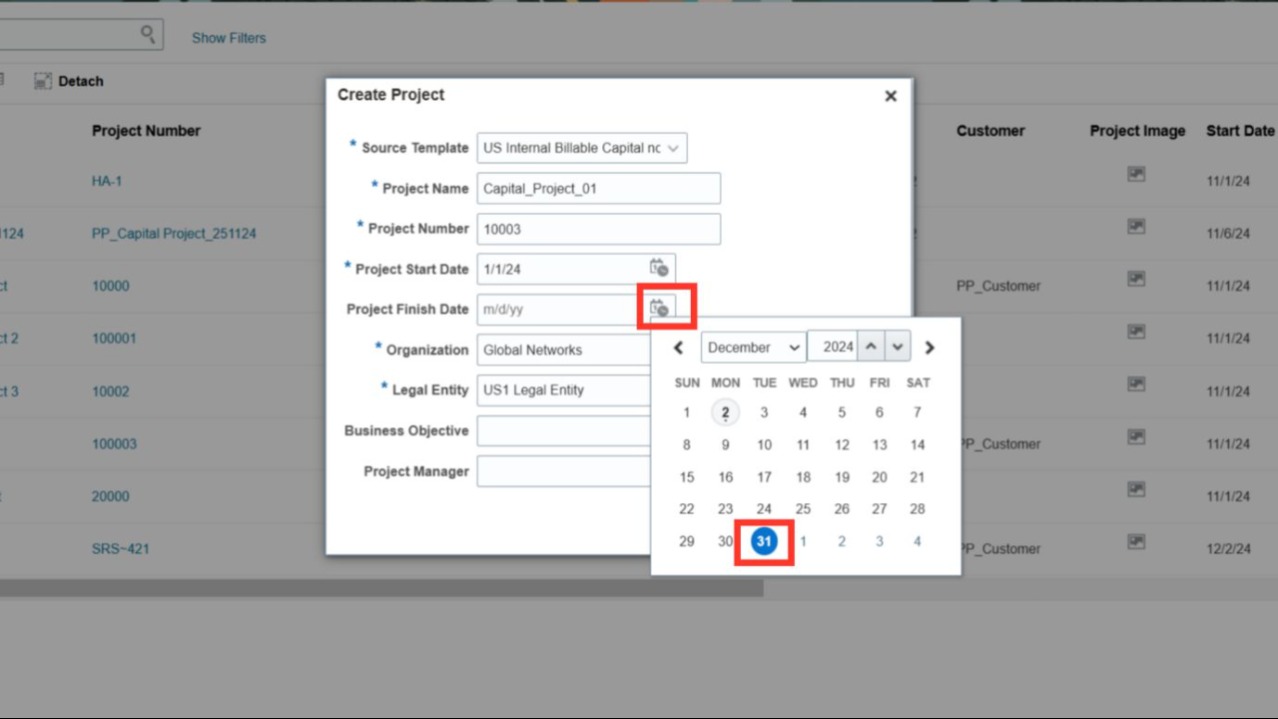
The Organization and Legal Entity values defaulted from the selected project template.
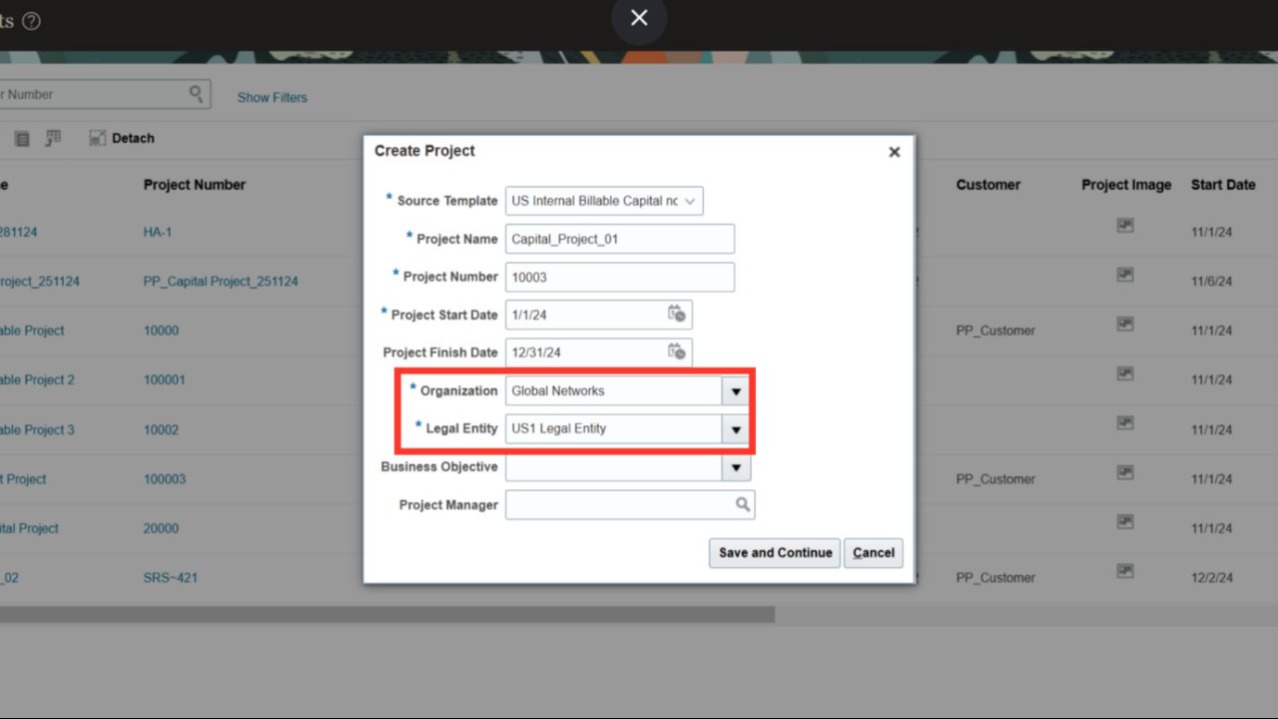
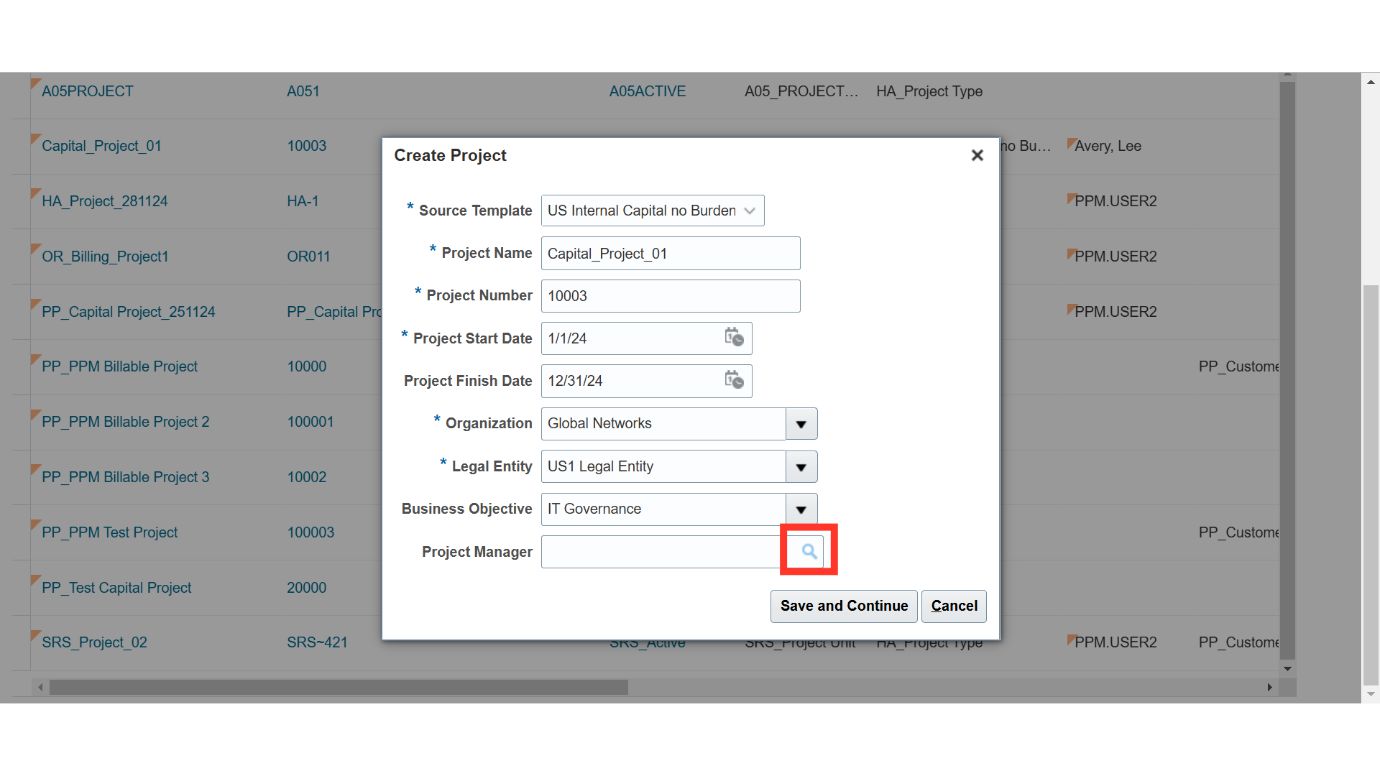
Click the Search button to select the Project Manager for the project.
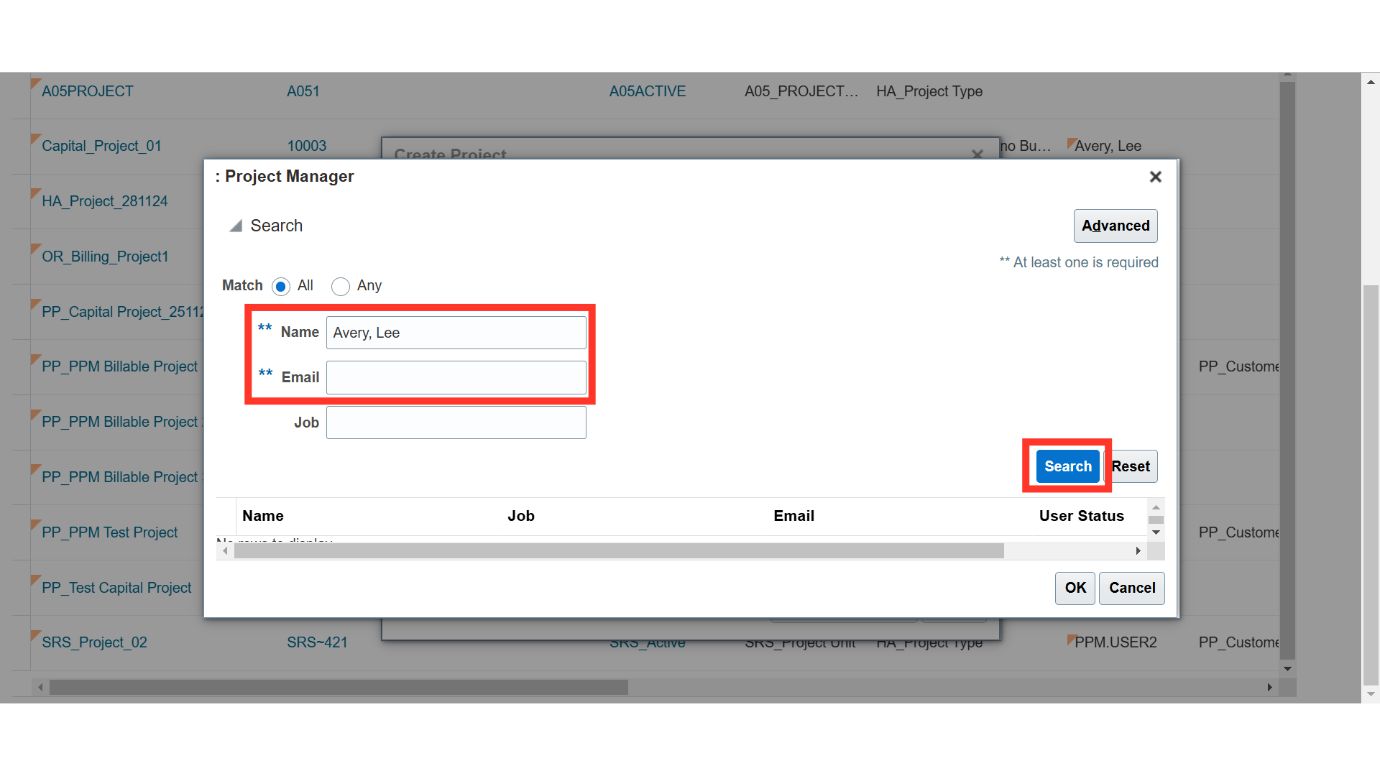
Search for the Project Manager using options like Name or Email, then click Search.
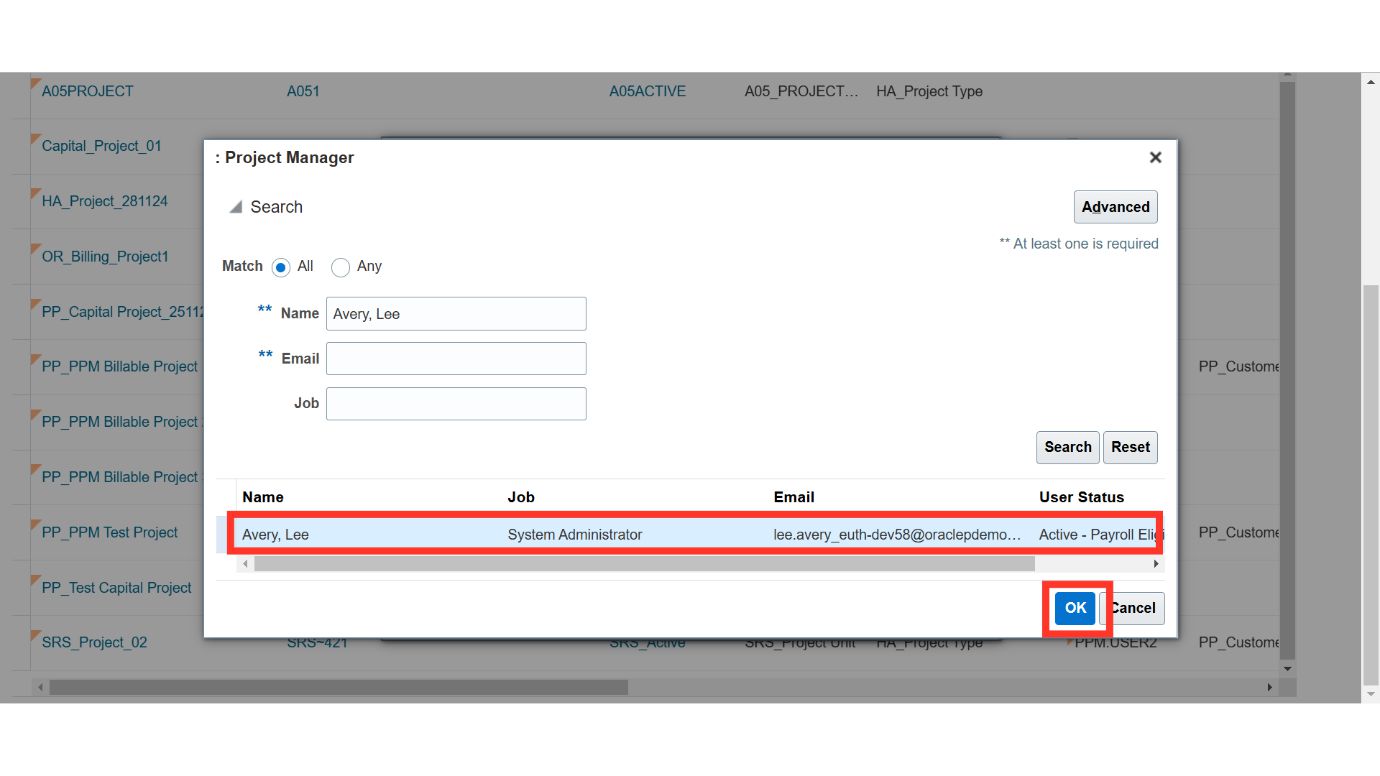
Once the desired search result appears, select the relevant row and click OK to assign the person as the Project Manager.
Once all details are entered, click Save and Continue to create the project in the Oracle Cloud.
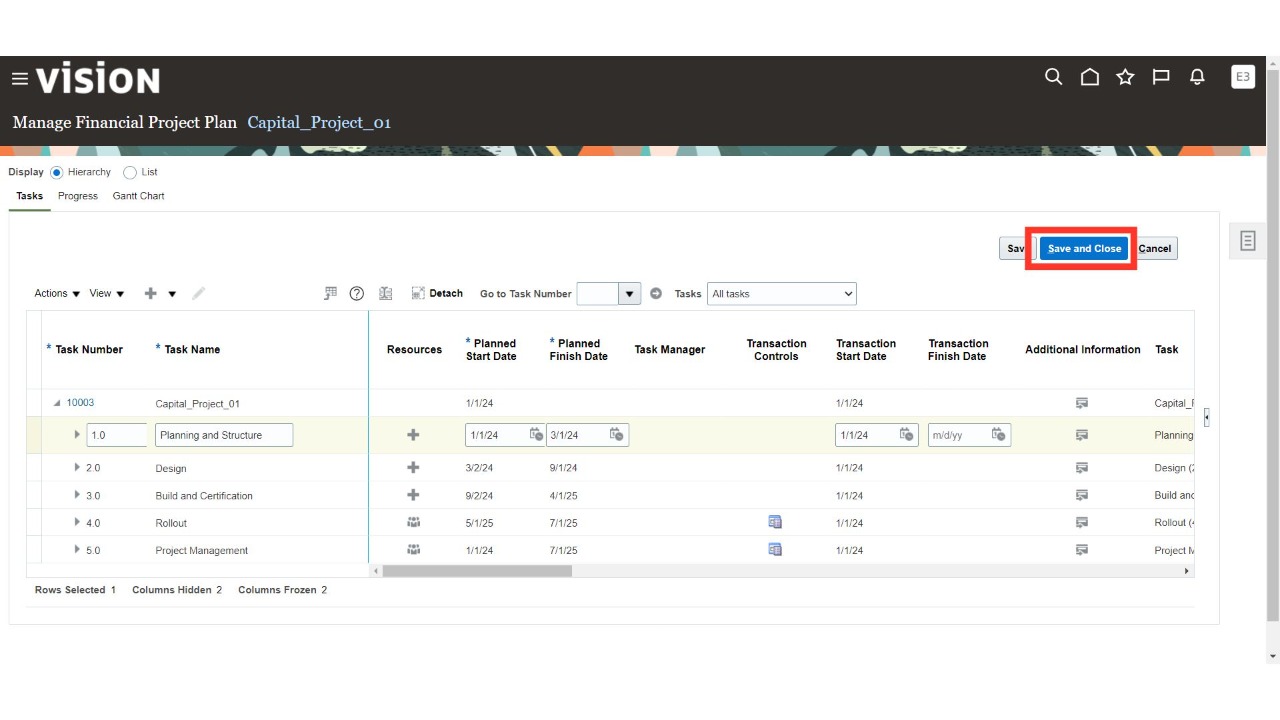
After creating the capital project, you will be redirected to the Manage Financial Project Plan screen. Details on updating the Financial Project Plan are covered in the subsequent process manuals.
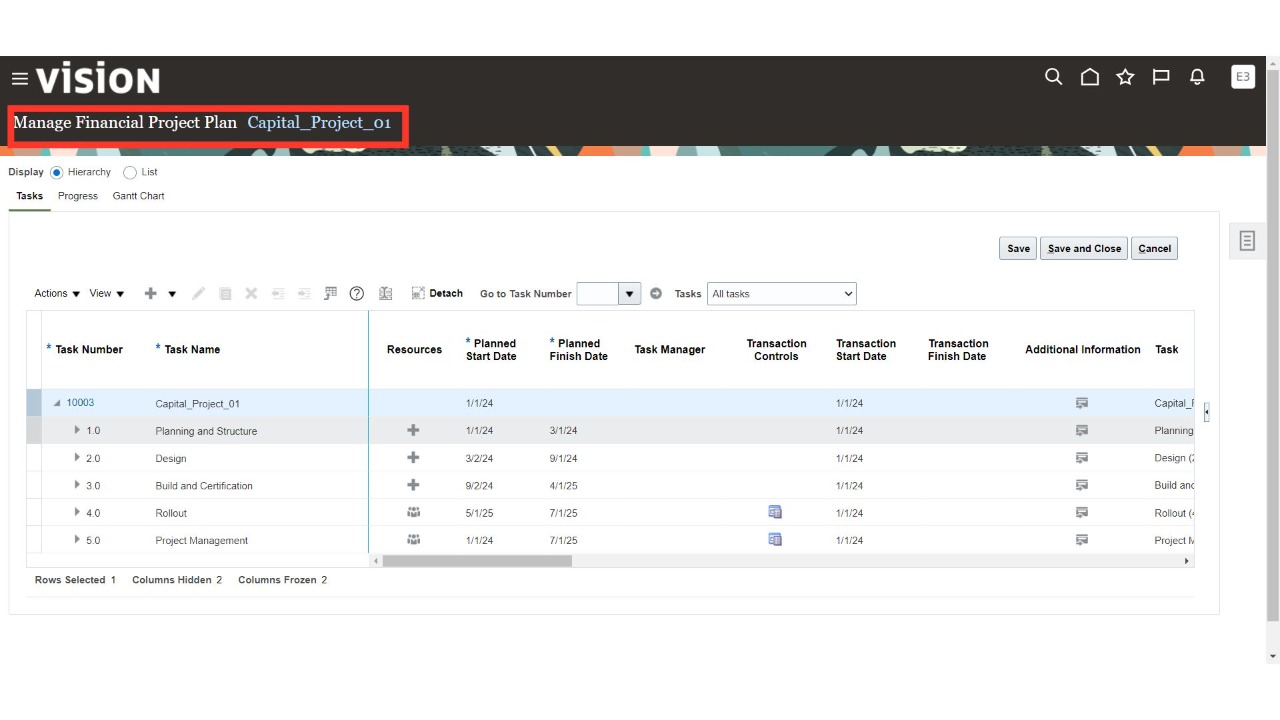
Click Save and Close to complete the process.